


EN-6
Preparing your projector
1
2
3
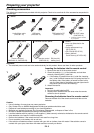
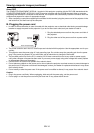
Checking accessories
The following accessories are provided with this projector. Check to be sure that all of the accessories are packed in
the package.
Important:
• The attached power cords are to be used exclusively for this product. Never use them for other products.
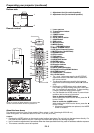
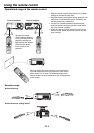
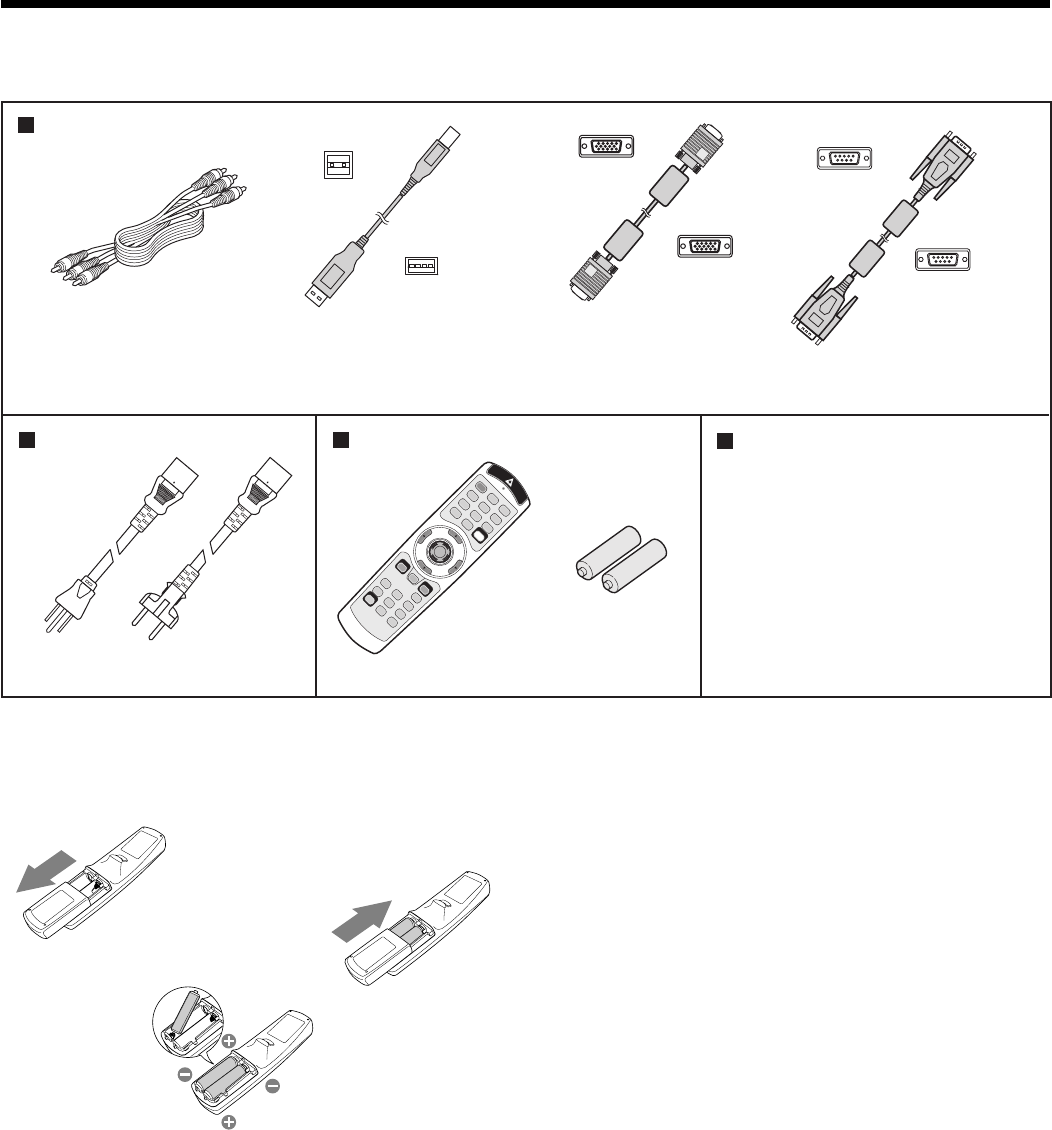
Inserting the batteries into the remote control
1. Remove the rear lid of the remote control.
2. Check the polarity (+), (-) of the batteries, and set them
correctly, inserting their (-) side fi rst.
• If the battery is inserted from the (+) side fi rst, inserting
the (-) side is diffi cult because the coil spring end hits on
the battery side. If the battery is forced to insert in this
way, the outer label of the battery may get ripped and it
may cause a short-circuit and heating.
3. Attach the rear lid.
Important:
• Use two size-AA batteries (R6).
• Replace the 2 batteries with new ones when the remote
control is slow to operate.
Removing the batteries from the remote control
Remove the back lid of the remote control and take out the
batteries.
Caution:
• Use of a battery of wrong type may cause explosion.
• Only Carbon-Zinc or Alkaline-Manganese Dioxide type batteries should be used.
• Dispose of used batteries according to your local regulations.
• Batteries may explode if misused. Do not recharge, disassemble, or dispose of them in fi re.
• Be sure to handle the batteries according to the instructions.
• Load the batteries with its positive (+) and negative (-) sides correctly oriented as indicated on the remote control.
• Keep batteries out of reach of children and pets.
• Remove the batteries, if the remote control is not used for a long time.
• Do not combine a new battery with an old one.
• If the solution of batteries comes in contact with your skin or clothes, rinse with water. If the solution comes in
contact with your eyes, rinse them with water and then consult your doctor.
Cables
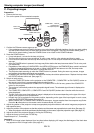
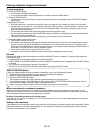
Power supply parts Remote control parts
Power cord (two)
(246C483-10, 246C383-20)
Remote control
(290P136-10)
R6 (size-AA)
battery (two)
RS-232C cable
(246C548-10)
RGB cable for PC
(246C521-10)
USB cable
(246C509-10)
Audio/Video cable
(246C381-10)
Others
• Lens cap (Attached to the
projector)
• Lamp replacement tray
(857C106-10)
• CD-ROM (919C167-20)
• Safety Manual/
Quick Start up (871D534-20)
Mini D-SUB
15-pin
Mini D-SUB
15-pin
D-SUB
9-pin
• Used for projector control
by computer.
USB 4-pin
(type B)
USB 4
-pin
(type A)
D-SUB
9-pin