


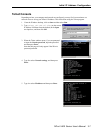

Initial IP Address Configuration
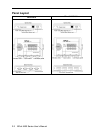
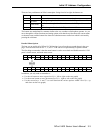
There are four push buttons on NPort’s nameplate. Going from left to right, the buttons are:
Button Name
Action
MENU menu activates the main menu, or returns to a lower level
U
up cursor
scrolls up through a list of items shown on the LCM panel’s second line
V
down cursor
scrolls down through a list of items shown on the LCM panel’s second
line
SEL
select
selects the option listed on the LCM panel’s second line
The buttons are manipulated in a manner similar to the way a modern cellular phone operates. As you
move through the various functions and setting options, note that the top line shows the current menu
or submenu name, and the bottom line shows the submenu name or menu item which is activated by
pressing the sel button.
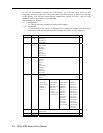
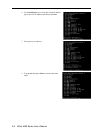
Detailed Menu Options
The best way to explain all of NPort’s LCM functions is to refer to the tree graph shown in the next
page. There are three main levels—1, 2, and 3—with each level represented by a separate column.
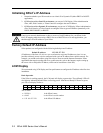
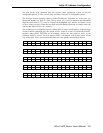
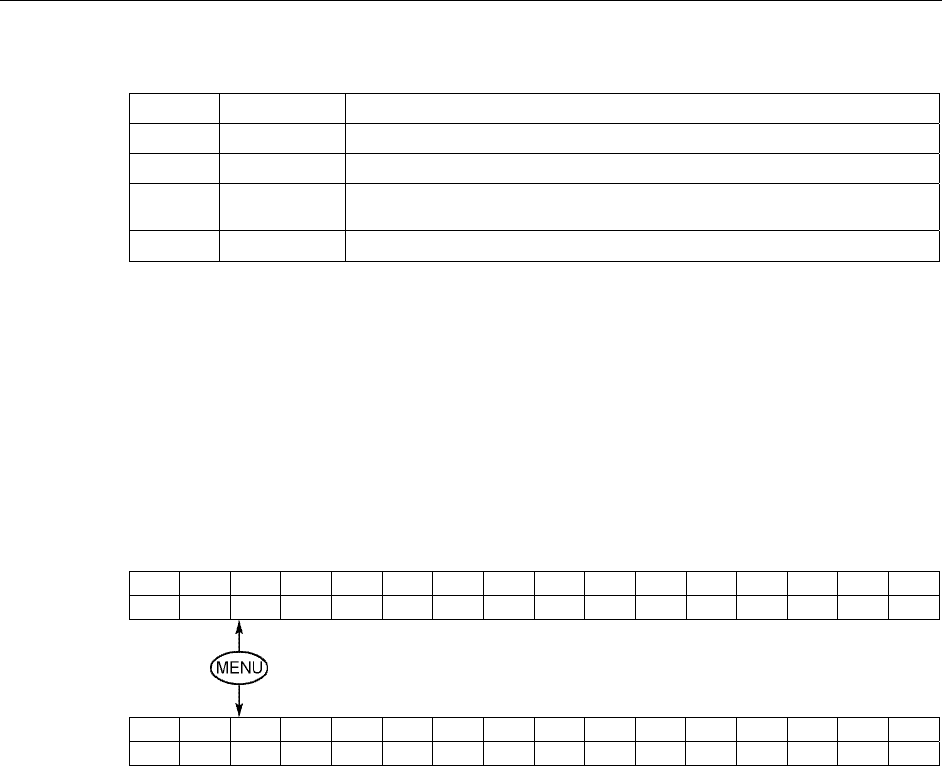
The first thing to remember is that the menu button is used to move back and forth between the LCM
panel’s default screen, and main menu screen:
N P 5 4 1 0 _ 6 1 4 0 5
1 9 2 . 1 6 8 . 1 2 7 . 2 5 4
M a i n M e n U
S e r v e r s e t t i n g ↓
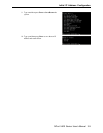
In addition, you only need to remember to:
• Use the sel button to move up one level (i.e., left to right on the tree graph)
• Use the menu button to move down one level (i.e., right to left on the tree graph)
• Use the cursor keys, U and V, to scroll between the various options within a level (i.e., up
and down on the tree graph).
NPort 5400 Series User’s Manual
3-3