


12
Chapter 2 - Installation
MT128ISA/PCI
Hardware Installation
Note: Disregard step 1 for models MT128ISA-UV only, and proceed to step 2.
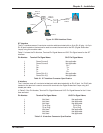
1. The ISDN S/T interface can support up to 8 ISDN terminals and NT1 device connecting to
the ISDN network. Only one ISDN S/T device should have the terminator enabled.
Normally, the ISDN terminal farthest from NT1 should have the terminator enabled.
Models MT128PCI-SD/SV and MT128ISA-UV provide two jumpers (JP1 and JP2) for the
terminator setup. The default setting for the adapter(s) is terminator enabled. If there are
other ISDN devices connected to the NT1 with ISDN adapter(s), and you do not require
your adapter as a terminator, remove the JP1 and JP2 shorting plugs (open circuit).
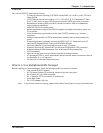
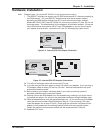
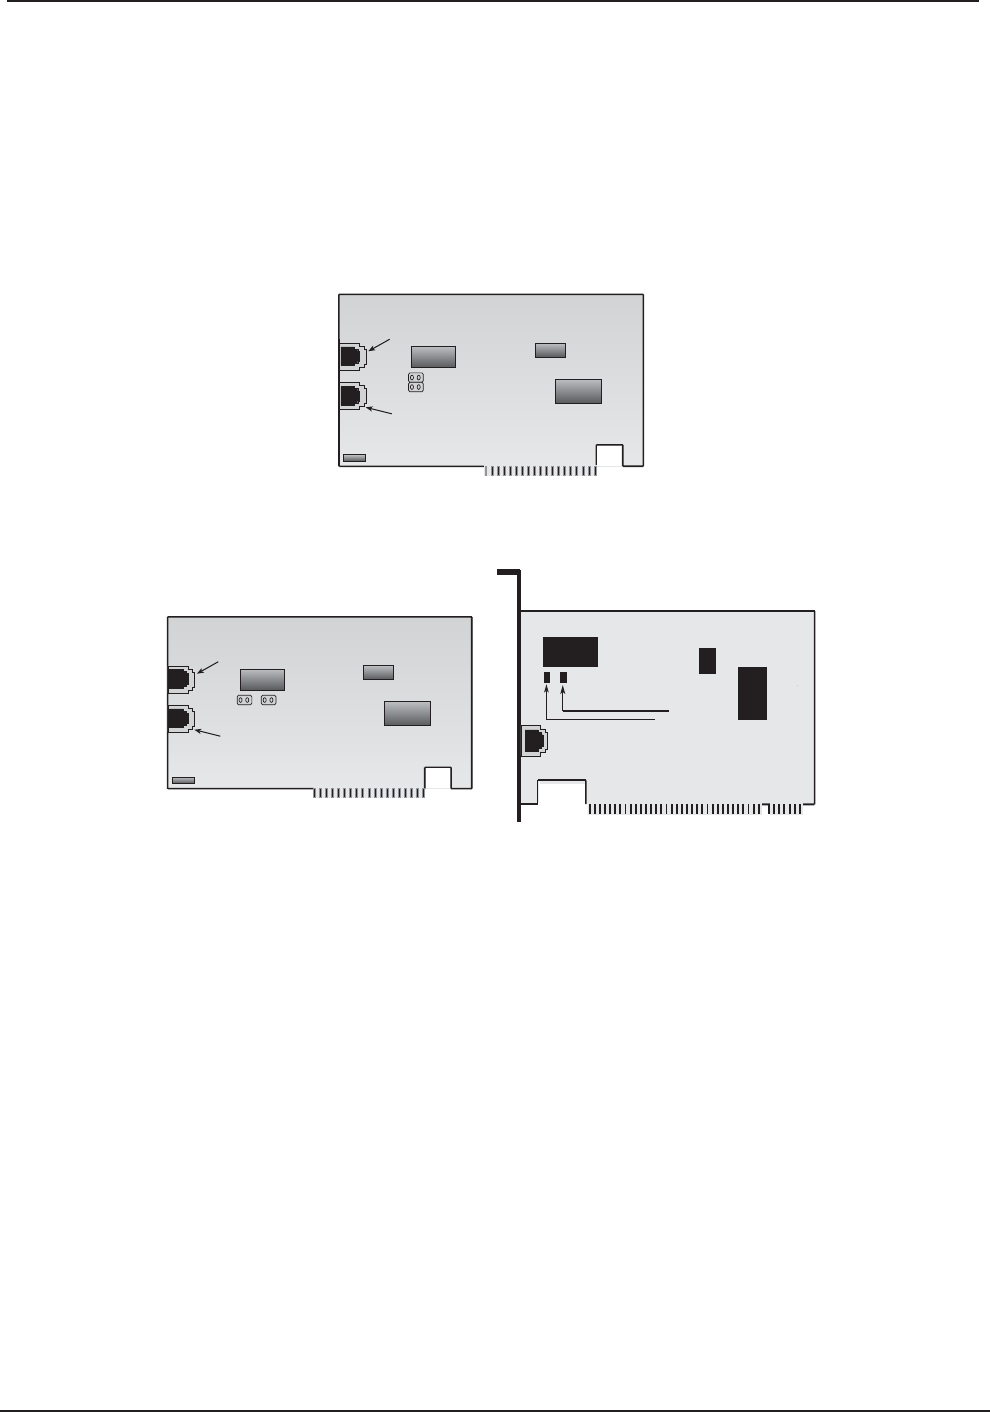
MT128ISA-Data/Voice
RJ11/Analog Connection
RJ45/ISDN
JP2
JP1
Figure 2-2. Internal ISDN ISA Adapter Illustration
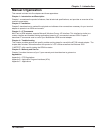
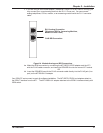
MT128PCI-Data/Voice
RJ11/Analog Connection
RJ45/ISDN
JP2
JP1
J1
J2
Figure 2-3. Internal ISDN PCI Adapter Illustrations
2a. Turn off your computer power and remove the PC cover.
2b. If you are using an ISA card, select an empty ISA slot for your adapter. If you are using a
PCI adapter, select an empty PCI slot for your card. Remove the expansion slot cover
and save the retaining screw.
2c. Before handling your adapter, discharge static in your body by touching a piece of
grounded metal such as the computer chassis.
2d. Carefully remove the ISDN adapter from the antistatic bag, handling it only by the mount-
ing bracket and edges. Do not touch the gold-plated connectors along the bottom edge.
2e. Place the adapter directly over the appropriate open slot. (If you are using an ISA adapter
insert the card into the open ISA slot selected in Step 2b. If you are using a PCI card,
insert the adapter into an open PCI slot.) Gently push the connector into place until the
adapter is firmly seated and the retaining bracket is flush with the computer chassis.
Fasten the bracket to the computer chassis with the screw removed in Step 2b.
2f. Replace the PC cover.