Quick Start Instructions MultiVOIP User Guide
38
Phone/IP Starter Configuration (continued)
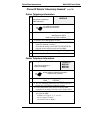
9. (continued) Whenever email log messages are sent out, they must
have a standard Subject line. Something like “Phone Logs for Voip
N” is useful. If you have more than one MultiVoip unit in the
building, you’ll need a unique identifier for each one (select a useful
name or number for “N”). In this “Subject” field, enter a useful
subject title for the log messages.
In the “Reply-To Address” field, enter the email address of your Voip
Administrator.
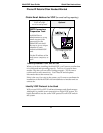
10. Go to Configuration | Logs.
Select “Enable Console Messages.” (Not applicable if using Web GUI.)
To allow log reports by email (if desired), click SMTP. Click OK.
To do logging with a SysLog client program, click on “SysLog Server
– Enable” in the Logs screen. To implement this function, you must
install a SysLog client program. For more info, see the “SysLog
Server Functions” section of the Operation & Maintenance chapter of
the
User Guide.
11. Enable premium (H.450) telephony features.
Go to Supplementary Services. Select any features to be used.
For Call Hold, Call Transfer, & Call Waiting, specify the key sequence
that the phone user will press to invoke the feature. For Call Name
Identification, specify the allowed name types to be used and a
caller-id descriptor.
If Call Forwarding is to be used, enable this feature in the
Add/Edit Inbound Phone Book screen.
12. Go to Save Setup | Save and Reboot. Click OK. This will save the
parameter values that you have just entered.
The MultiVOIP’s “BOOT” LED will light up while the configuration
file is being saved and loaded into the MultiVOIP. Don’t do anything
to the MultiVOIP until the “BOOT “LED is off (a loss of power at this
point could cause the MultiVOIP unit to lose the configuration
settings you have made).
END OF PROCEDURE.


