


Advanced features
12
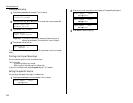
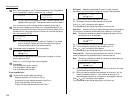
Next, the machine asks for your F-Code box s password. This is the password
for
ITU
-
T
-compatible F-Code fax transactions. The
LCD
shows:
or
Note: You don t need to have a password for the F-Code box. However, using
a password will make your F-Code communication much more secure.
If you do not want to enter or change this box s password, skip to step 14.
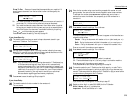
13
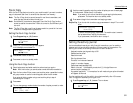
Use the numeric keypad to enter this box s
ITU
-
T
-compatible password. This
password can be up to 20 characters in length and include any combination of
numbers and the * and # characters (but no other non-numerical characters).
Here, we ve entered 135*7#9.
Note: You cannot change the type of an existing F-Code box. If you re modi-
fying an existing F-Code box and want to change the box type, you
first must erase the old box, then create a new one.
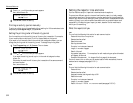
14
Press
ENTER
to save the password. The
LCD
now shows:
The fax machine is asking which box type you want to assign to this box
bulletin, security or relay.
Press or until the type of box you want appears.
15
Press
ENTER
.
If you chose Bulletin, go on to step 16.
If you chose Security, skip to step 17.
If you chose Relay, skip to step 20.
If you chose Bulletin:
16
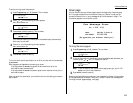
The bulletin box has four additional settings:
Reception protection ( Rx Protect on the
LCD
)
Automatic printing of received documents ( Auto Print )
Overwriting documents ( Overwrite Doc. )
Erasure of transmitted documents ( Erase Tx Doc. )
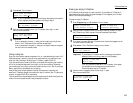
Rx Protect Reception protection tells this box if it s okay to receive
documents from remote locations. Callers can then poll these documents.
On: Open this box to receive documents from callers.
Off: Do not open this box to receive documents from callers.
Press or until the mode you want appears.
Then press
ENTER
to save the setting and go on to the next one.
Auto Print Automatic printing of received documents tells the fax machine
if it should print a document automatically upon receiving it into this box.
Note: This setting is available only when the reception protection (Rx pro-
tect) setting is set to off (see above).
On: Print the document automatically when the box receives it.
Off: Print the document manually, when you want to print it.
Press or until the mode you want appears.
Then press
ENTER
to save the setting and go on to the next one.
Overwrite Doc Overwriting documents tells your machine if it should
overwrite (erase) existing documents when it receives a new one.
Note: This setting is available only when the reception protection setting is
set to off (see Rx Protect above).
On: When your machine receives a new document into this box, it will erase
any documents currently stored in it.
Off: When your machine receives a new document into this box, it will not
erase the documents stored in it. Your machine can store up to 30
documents (each document can include one or more pages) in each box.
Press or until the mode you want appears.
Then press
ENTER
to save the setting and go on to the next one.
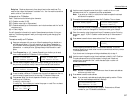
Overwrite Doc. :Off
←←
/
→→
/Enter
Auto Print :Off
←←
/
→→
/Enter
Rx Protect :Off
←←
/
→→
/Enter
Box Type :Bulletin
←←
/
→→
/Enter
03:Password
135*7#9_
03:Password
123456789*#_
03:Password
_
3.28