Chapter 1 Installing and Configuring the SCXI-119X
SCXI-1190/1191/1192 User Manual 1-14 ni.com
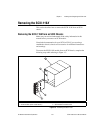
1. Turn off the SCXI chassis power.
2. Remove all signals connected to the SCXI-119X.
Caution
Do not remove the SCXI-119X module from a chassis that is turned on because
doing so could damage the module.
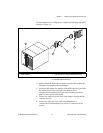
3. Rotate the thumbscrews securing the SCXI-119X to the chassis
counter-clockwise until they are loose, but do not completely remove
the thumbscrews.
4. Remove the SCXI-119X by pulling steadily on both thumbscrews until
the module slides completely out.
Removing the SCXI-119X from Measurement & Automation Explorer
To remove a module from MAX, complete the following steps:
1. Double-click the Measurement & Automation Explorer icon on
your PC desktop.
2. Expand Devices and Interfaces. Locate the chassis in the list of
installed devices.
3. Expand Chassis.
4. Right-click on the module or chassis you want to delete and select
Delete.
5. You are presented a confirmation window. Click Yes to continue
deleting the module or chassis or click No to cancel this action.
Note
Deleting an SCXI chassis deletes all modules in the chassis. All configuration
information for these modules is also lost.
Your SCXI chassis and/or SCXI module(s) should now be removed from
the list of installed devices in MAX.


