


Upgrading Your System 4-27
4.
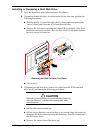
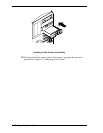
Remove the hard disk drive from the disk carrier.
5.
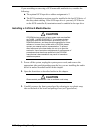
Remove the new drive from its protective wrapper, and place on an antistatic
surface.
!
CAUTION
Observe static precautions. Use an antistatic wrist strap.
6.
Record the drive model and serial numbers in the equipment log.
7.
Before continuing with the next step, if you are installing a hard disk in a
disk carrier for the first time, attach the front panel to the disk carrier's frame
and secure it with the two screws removed in step 2.
8.
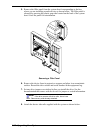
Install the drive on the drive carrier.
!
Place the drive on the carrier, with its connector facing the back of the
carrier.
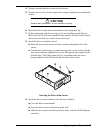
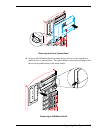
!
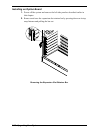
Turn the drive and carrier over and secure the drive in the carrier with the
four screws and one additional screw and EMI ground clip supplied with
the disk drive. The EMI ground clip (A) is installed under the screw
being installed on the left side toward the front of the carrier.
Securing the Drive in the Carrier
9.
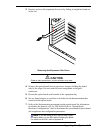
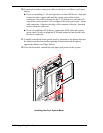
Install the drive carrier with drive into the bay as follows:
!
Close the drive carrier handle.
!
Align the drive carrier with the bay guide rails.
!
Slide the drive carrier into the bay until it docks with the SCSI backplane
connector.