


4-10
Upgrading Your System
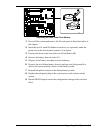
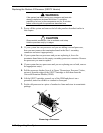
Installing the Pentium II Processor (S.E.C. Version)
1.
Power off the system and remove the left side panel as described earlier in
this chapter.
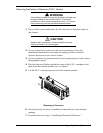
!
CAUTION
Observe static precautions. Use an antistatic wrist strap.
Hold the processor only by its edges.
2.
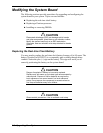
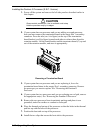
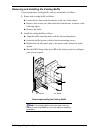
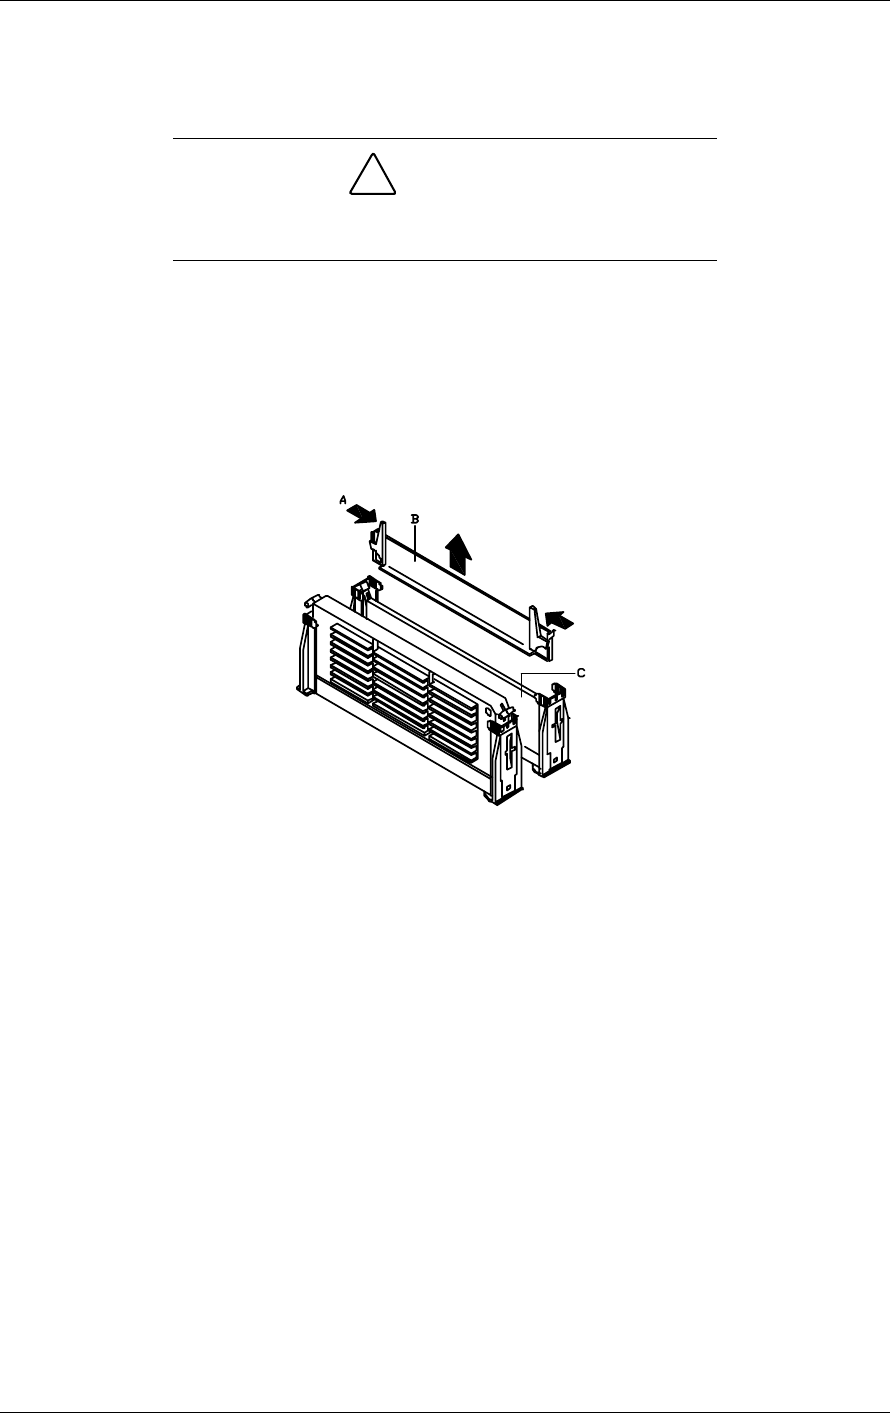
If your system has one processor and you are adding a second processor,
then you must remove the termination board in the empty Slot 1 secondary
connector. Press the tabs (see A in figure) on the top of the termination
board bracket (see B in figure) toward each other to release them from the
retention module. Lift the board bracket and the terminator board (C) up and
out of the retention module, and store it appropriately.
Removing a Termination Board
3.
If your system has one processor and you are replacing it, leave the
termination board intact in the empty Slot 1 secondary connector. Remove
the processor you want to replace. See “Removing the Pentium II
Processor.”
4.
If your system has two processors and you are replacing one or both, remove
the appropriate one(s). See “Removing the Pentium II Processor.”
5.
Remove the new processor from its antistatic package and place it on a
grounded, static-free surface or conductive foam pad.
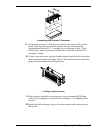
6.
Place the thermal pad on top of the processor so that the holes in the thermal
pad line up with the holes in the processor.
7.
Position the heat sink on top of the processor.
8.
Install the two clips that secure the heat sink to the processor.