Connecting the Router to the Internet 2-1
Chapter 2
Connecting the Router to the Internet
This chapter describes how to set up the router on your local area network (LAN) and connect to
the Internet. You find out how to configure your MR814v2 Cable/DSL Wireless Router for
Internet access using the Setup Wizard, or how to manually configure your Internet connection.
What You Will Need Before You Begin
You need to prepare these three things before you begin:
1. Have active Internet service such as that provided by an cable or DSL broadband account.
2. Locate the Internet Service Provider (ISP) configuration information for your DSL account.
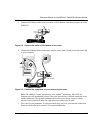
3. Connect the router to a cable or DSL modem and a computer as explained below.
Cabling and Computer Hardware Requirements
To use the MR814v2 router on your network, each computer must have an installed Ethernet
Network Interface Card (NIC) and an Ethernet cable. If the computer will connect to your network
at 100 Mbps, you must use a Category 5 (CAT5) cable such as the one provided with your router.
Computer Network Configuration Requirements
The MR814v2 includes a built-in Web Configuration Manager. To access the configuration menus
on the MR814v2, your must use a Java-enabled web browser program which supports HTTP
uploads such as Microsoft Internet Explorer or Netscape Navigator. NETGEAR recommends
using Internet Explorer or Netscape Navigator 4.0 or above. Free browser programs are readily
available for Windows, Macintosh, or UNIX/Linux.
For the initial connection to the Internet and configuration of your router, you will need to connect
a computer to the router which is set to automatically get its TCP/IP configuration from the router
via DHCP.
Note: For help with DHCP configuration, please refer to Appendix C, “Preparing Your Network”.


