


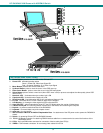

NTI RACKMUX KVM Drawer with NODEMUX Switch
11
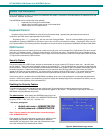
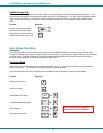
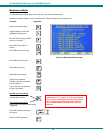
System Access List
The System Access List (accessible from the User Name List- page 10) displays a list of numbers representing the ports. From
this screen the administrator can change access rights to the ports for the selected user. The user’s name is displayed at the top
of the access list for reference. The mouse is used to change access rights by clicking on a given number to toggle a port’s
status. A user that has access to a port can connect to that port and control the CPU connected to that port when in Normal
Mode.
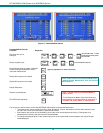
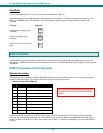
Function: Keystroke:
Save the changes to the access
list and return to previous mode
Exit the System access list without
saving and return to previous mode.
User Access Functions
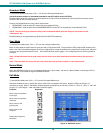
Introduction
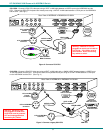
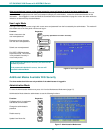
The OSD menu enables a user to name the CPUs connected to the NODEMUX switch and connect to them using that name.
The OSD is positioned on the monitor, displaying 8 CPU names at a time. The screen can be used for switching as well as editing
the CPUs’ names. Through the OSD menu, the user can operate the NODEMUX switch to have the switch cycle through 3
extended modes of operation: COMMAND, BROADCAST, and SCAN .
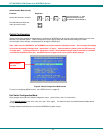
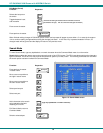
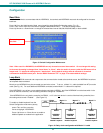
Command Mode
When entering the Command Mode from the keyboard using the <Ctrl> + <`> (accent key), the OSD menu will automatically
appear on the monitor. This provides a visual way to control the NODEMUX switch.
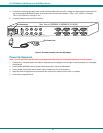
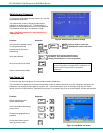
The list below describes the OSD Command functions available from the keyboard after entering Command Mode:
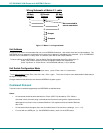
Function: Keystroke:
Select the previous port
Select the next port
Enable/disable Scan Mode
Enable/disable Broadcast Mode
Enter Edit Mode
Enter Maintenance Mode
S
Ctrl
+
E
Ctrl
+
M
Ctrl
+
B
Ctrl
+
Esc
Enter
Note: The user must be logged in as
administrator to access Edit Mode