CaptureNX-D Reference Manual
44
Introduction Viewing Pictures Filters Image Adjustment Other Features Menu Guide
Menu Guide
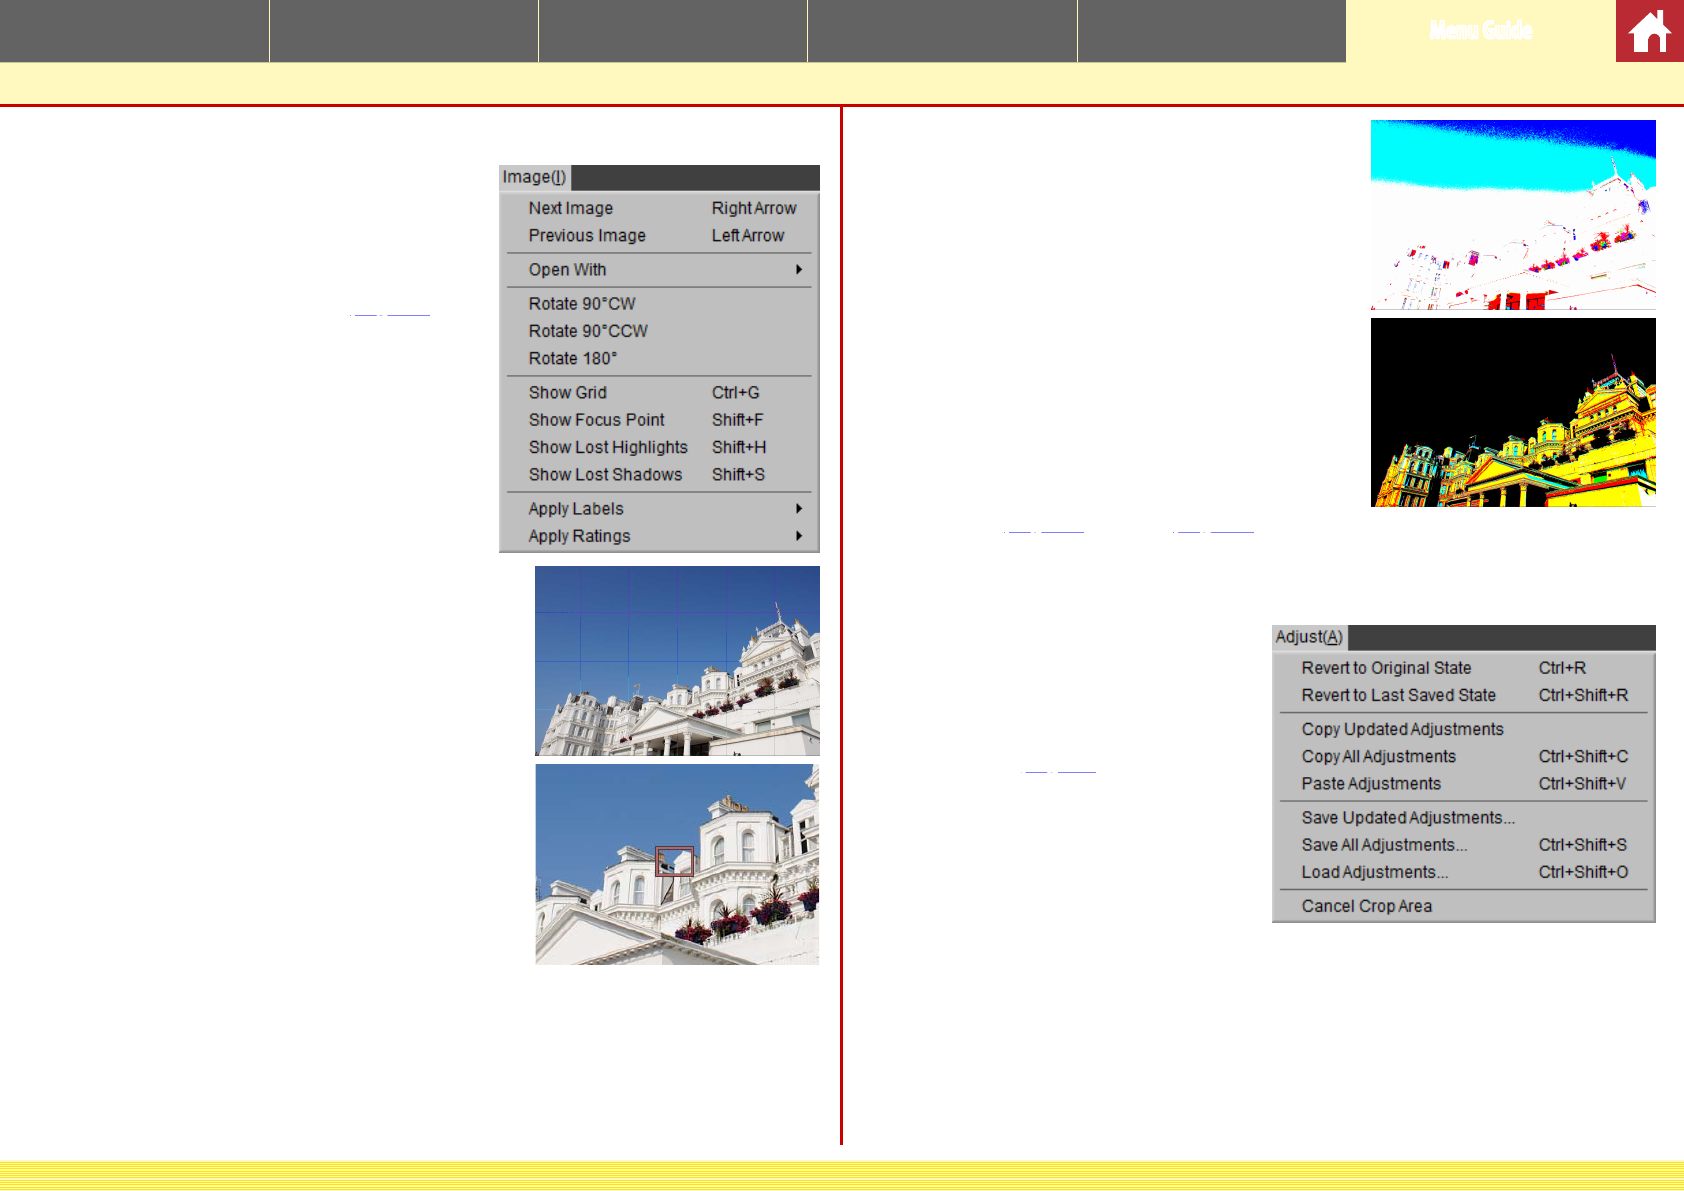
The Image Menu
• Next Image/Previous Image: View the next or
previous image in the current folder.
• Open With: Open the current image in anoth-
er application. Use the Register option to
add applications to the menu (
page 42).
• Rotate: Rotate the current image 90 or 180
degrees.
• Show Grid: Display a grid over the preview.
• Show Focus Point: Show the focus point in the pre-
view display.
• Show Lost Highlights: View areas of the image
with the maximum value for brightness and in
which details may have been lost to overexpo-
sure (“washed out”). A dierent color is used to
show the lost highlights for each of the RGB, red,
green, and blue channels.
• Show Lost Shadows: View areas of the image with
the minimum value for brightness and in which
details may have been lost to underexposure. A
dierent color is used to show the lost shadows
for each of the RGB, red, green, and blue chan-
nels.
• Apply: Label (page 16) or rate (page 15) selected images.
The Adjust Menu
• Revert to Original State: Reset all image
adjustments and restore the picture
to its original state.
• Revert to Last Saved State: Initialize the
settings le (
page 3), cancelling all
changes made in Capture NX-D.
• Copy Updated Adjustments: Copy only those
adjustments that have been changed
since the current folder was last opened.
• Copy All Adjustments: Copy all adjustments.
• Paste Adjustments: Apply to the current image adjustments copied using Copy
Updated Adjustments or Copy All Adjustments.
• Save Updated Adjustments: Create a le containing only those adjustments that
have been changed since the current folder was last opened.
• Save All Adjustments: Save all adjustments to a le.


