13
Help
Click the Help button for online help.
The “Select Action” Dialog
The other options in the “Select Action” dialog are described below. Note that the camera
need not be connected to a computer to choose a printer or change the upload folder.
• Change password: The dialog shown at right will be displayed.
By default, no password is required to change device pro-
fi les using the WT-3 Setup Utility. A password can be added
by selecting Change password. If the camera is later con-
nected to a diff erent computer, a password prompt will be
displayed. Once the correct password has been entered, the
prompt will not be displayed again. To change an existing password, enter the old password
before typing the new password. To remove the password, select Reset password (pro-
fi les will be lost) and click Next. Please note that resetting the password deletes all existing
device profi les from the camera. Click Back to exit without changing password settings.
• Setup wireless printer: By default, the system default printer for the host computer will be used
when printing pictures. To choose a diff erent printer, select Setup wireless printer ( 17).
• Setup picture folder: The dialog shown at right will be dis-
played. Select a destination for uploaded pictures from the
following options and click Next:
Use PictureProject folder: Pictures will be cataloged in
PictureProject version 1.6.1 or later.
Specify a diff erent folder: To choose a folder, click the button.
The default destination is the “WT-3” folder in “My Pictures” (Windows) or “Pictures” (Macin-
tosh).
7
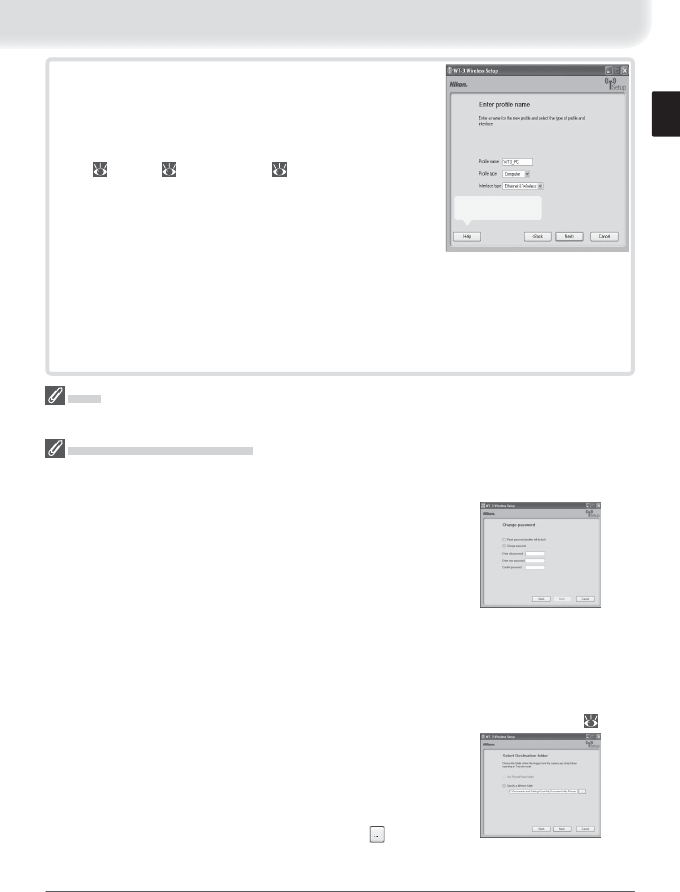
Enter the following information.
• Profi le name: Enter a name of up to 16 characters.
• Profi le type: Choose FTP server to confi gure the cam-
era for ftp (transfer mode only), or Computer to con-
fi gure the camera for use with a computer in transfer
( 21), PC ( 26), and print ( 30) modes.
• Interface type: Choose Ethernet only if the network
does not include wireless, or Ethernet and Wireless
for wireless or wireless and Ethernet networks.
Click Next. When a new profi le is created under
Windows XP Service Pack 2, the dialog shown in Step 8 will be displayed.
With third-party LAN adapters or fi xed IP addressing, or a profi le created un-
der Windows XP Service Pack 1 or Mac OS, proceed to Step 9 if Ethernet
and Wireless is selected for interface type, or to Step 10 if Ethernet only
is selected.
Help button
