49
4
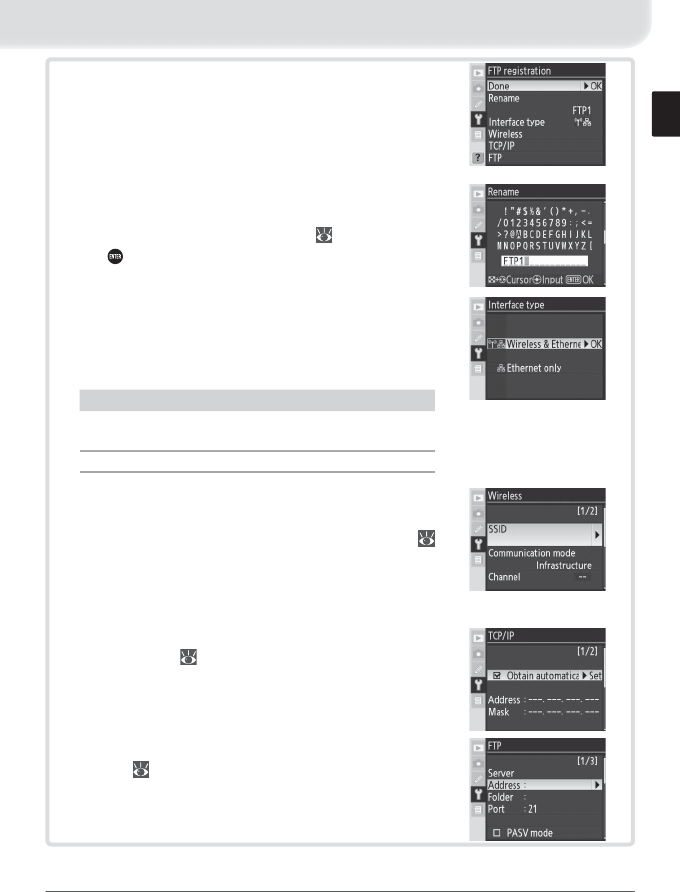
The registration dialog shown at right will be
displayed. Press the multi selector up or down
to highlight an option, then press to the right to
select. Select Done to proceed to Step 5 when
settings are complete.
Rename: The dialog shown at right will be dis-
played. Enter a profi le name of up to 16 charac-
ters as described in “Text Entry” (
35) and press
the button to return to the registration dialog.
Interface type: The dialog shown at right will be
displayed. Highlight one of the following options
and press the multi selector to the right to return
to the registration dialog.
Option Description
Wireless & Ethernet
(default)
Connect via wireless and/or Ethernet.
Ethernet only Connect via Ethernet only.
Wireless: If Wireless & Ethernet is selected for
Interface type, select this option to adjust wire-
less settings as described in the Menu Guide (
35–38). Press the multi selector to the left to re-
turn to the registration dialog when settings are
complete.
TCP/IP: Adjust TCP/IP settings as described in the
Menu Guide ( 38–41). Press the multi selector
to the left to return to the registration dialog
when settings are complete.
FTP: Adjust ftp settings as described in the Menu
Guide ( 42–45). Press the multi selector to the
left to return to the registration dialog when set-
tings are complete.


