34
6 Copying files from/to a card <Mac OS 9
ࡗ
Operation>
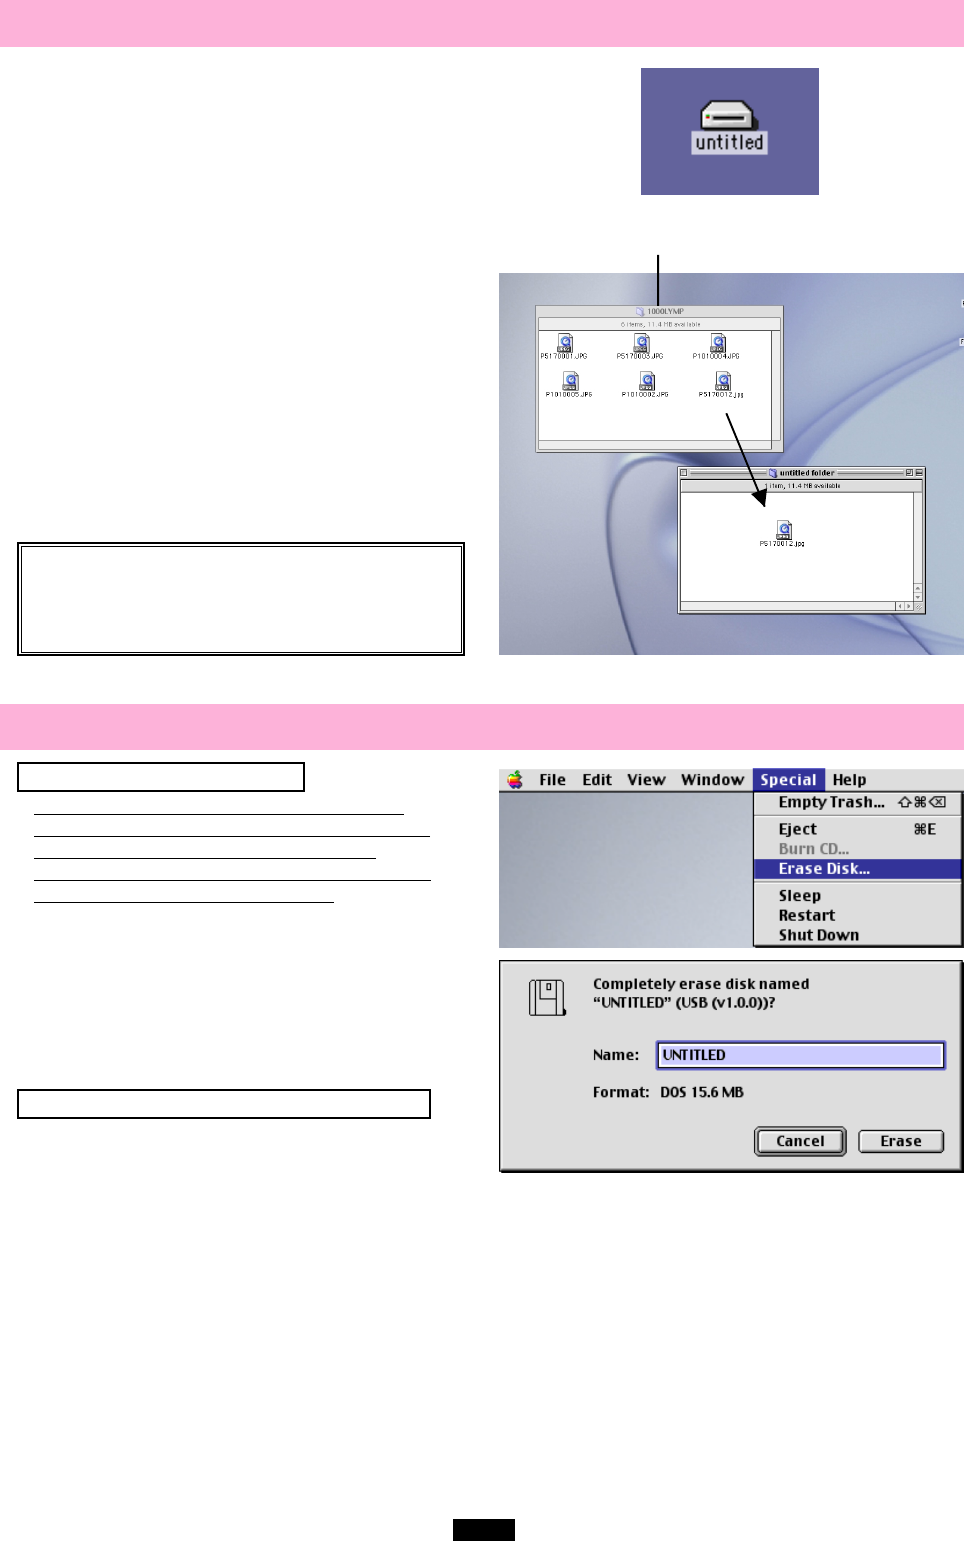
1. Insert a card into the MAUSB-100 and connect it
to the computer's USB port.
● The green status lamp lights, then the card icon
appears on the desktop.
● The icon’s appearance may vary, depending on the
card and the OS version.
2. Double-click the icon to display the files that you
want to copy.
● For information about how to locate the files you
want to copy, refer to the manual for the product
used to record them.
3. Drag the file icons you want to copy and drop
them onto the destination folder.
● The process is the same as copying files from a
floppy disk.
● It is also possible to move files to another folder,
erase files, or write data from another folder. (Data
cannot be written to or erased from a card when the
write-protect switch is set to the ON position.)
7 Formatting a card <Mac OS 9
ࡗ
Operation>
Before formatting the card
● If a card is going to be used with a digital
camera, be sure to format it with the camera
you are using. Cards formatted by the
computer using the MAUSB-100 may not be
recognized by the digital camera.
● It is not possible to format a card or write, move or
erase data on a card when the write-protect
switch is set to the ON position. Set the write-
protect switch to the OFF position and format the
card.
● Formatting erases all data in the card. All
important data should be copied to a hard disk,
etc. beforehand.
Formatting a card with the MAUSB-100
1. Select [Erase Disk] from the [Special] menu.
2. If a confirmation window appears, make sure the
card you want to format is selected and click
[Erase].
● Formatting starts.
The window containing the files to be copied
Drag & Drop
To perform a drag and drop, press and hold the mouse
button over the selected file(s), then move the mouse
(drag) and release the button at the place where you want
to copy (drop).


