Replacement
ENGLISH -
63
Maintenance
Replace the air lter units.2 )
Put new lters back into the position. Make sure that the lters are fully inserted to the projector.
z
Resetting the Filter Counter
J
Be sure to reset the Filter counter after replacing the lter. (
Æ
page 59 "
Filter counter reset
")
Attention
Turn off the power before you replace the air lter unit.
z
When attaching the air lter unit, make sure that the projector is stable, and work in an environment that is
z
safe, even in the event of the air lter unit dropping.
Do not operate the projector with the lters removed. Dust may accumulate on the optical elements degrading
z
picture quality.
Do not put anything into the air vents. Doing so may result in malfunction of the projector.
z
Do not wash the lters with water or any other liquid matter. Otherwise the lters may be damaged.
z
Attaching the Filter Cover to the Projector
J
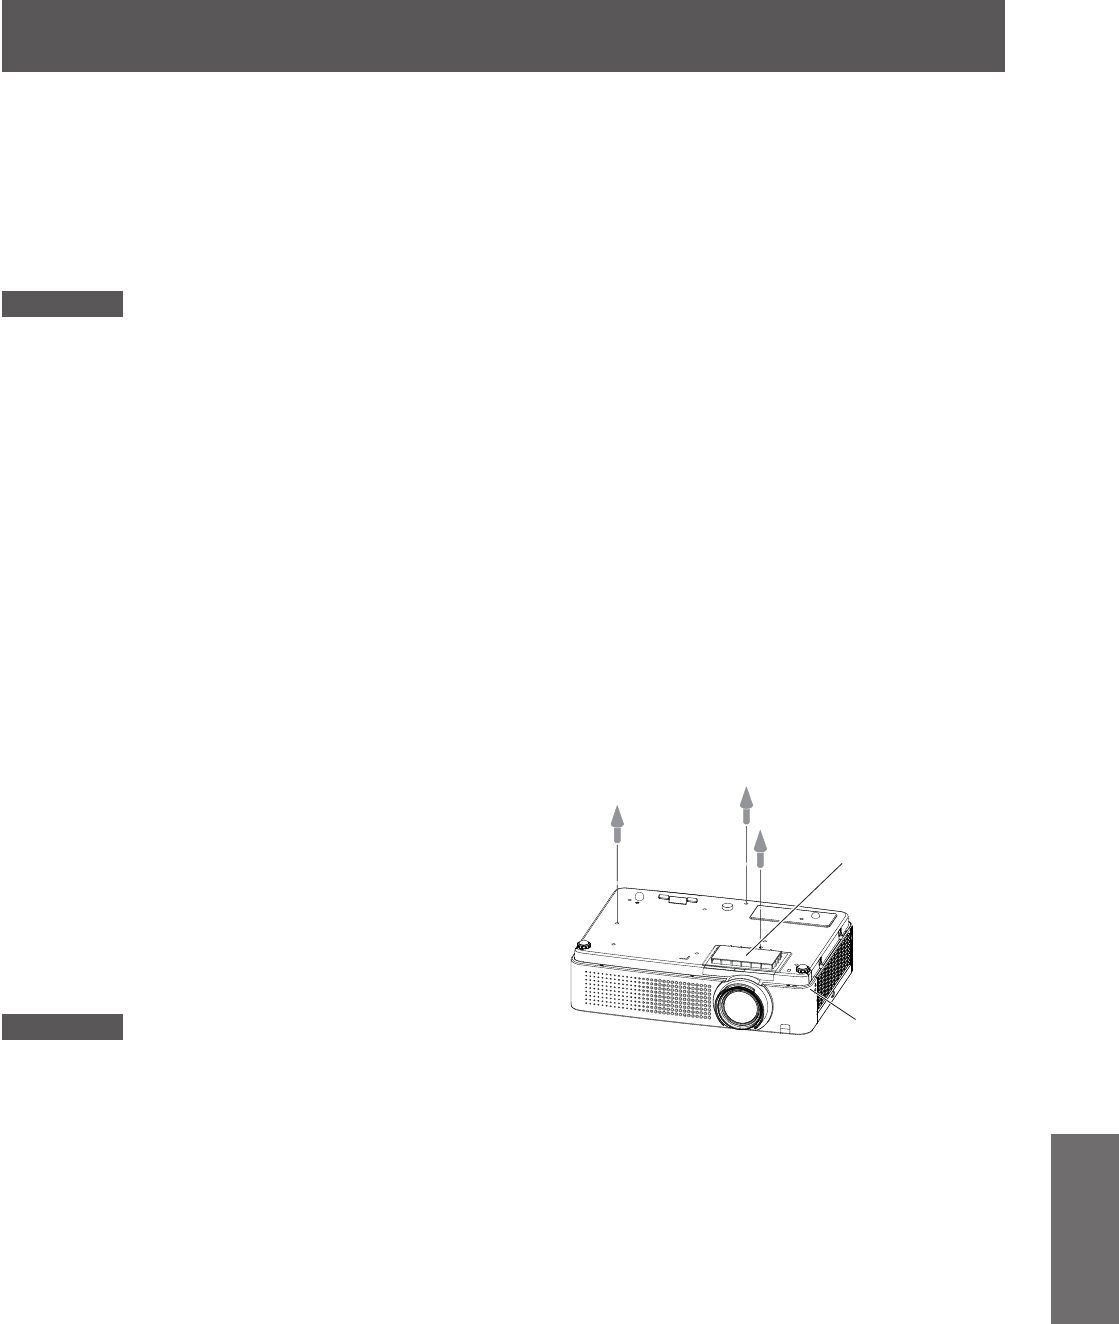
The supplied lter cover is designed for preventing dust accumulation on the lter when mounting the projector on
the ceiling.
Turn over the projector.1 )
Remove the lter cover (bottom). 2 )
(
Æ
page 62)
Attaching the lter cover to the projector.3 )
Push the cover as the picture shown.
z
Attach the projector to the ceiling mount 4 )
in accordance with the instruction
manuals which come with the ceiling
mount.
Attention
Please keep the lter cover (bottom) for later use.
z
If the Projector Mount Base ET-PKV100B is applied, the supplied lter cover is unnecessary.
z
To Ceiling Mount
Filter Cover
(supplied)
Projector


