


Connecting and Operating with a personal computer
37
For Windows 98SE/Me
1 Before installation, check that all applications have been
exited.
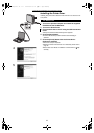
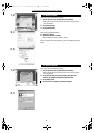
2 Connect the printer to your personal computer with a
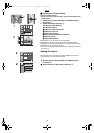
USB cable and turn on the printer.
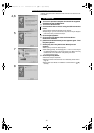
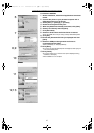
3 Select [Start] >> [Settings] >> [Printers].
4 Double-click the [Add Printer] icon.
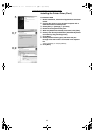
5 When the [Add Printer Wizard] is activated, click [Next].
6 Select [Local Printer] and click [Next].
7 Click [Have Disk].
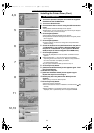
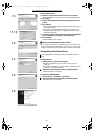
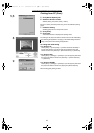
8 Select the folder where the Printer Driver is located.
≥If the CD-ROM drive is the [D: drive], select [D:\Win9X-Me] folder.
9 Click [OK].
10 Check that [Panasonic SV-AP10] is displayed and click
[Next].
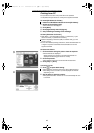
11 Select the USB port through which the Printer is
connected and click [Next].
≥Select [USB00X], for example [USB001].
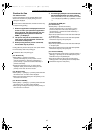
12 Click [Next].
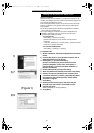
≥If a screen to select the default printer is displayed, select [Yes] if it
is to be the default printer.
13 Click [Finish].
≥If a screen asking you to execute a test print is displayed during
installation, select [No].
≥The installation is now complete.
7
6
8,9
10
11
12,13
AP10U-Eng.book 37 ページ 2002年9月27日 金曜日 午前10時8分