


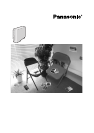


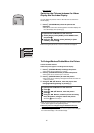

Preparation
9
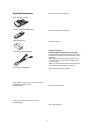
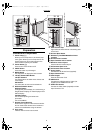
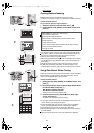
Insertion and Connections
ªInsertion
Be sure to insert the stand when selecting the Vertical layout and the
feet when selecting the Horizontal layout.
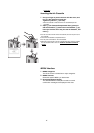
Insertion for Vertical Layout
1 Insert the stand into the holes as shown in the
illustration.
2 Tighten the screw to join the main unit and the stand.
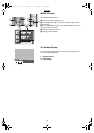
Insertion for Horizontal Layout
1 Attach the feet for Horizontal Layout to the four corners
of the side which does not have a vent on the main unit.
(Attach them to the position of mark
A.)
≥When detaching the feet, coating may be peeled off. Do not detach
them after attaching them.
≥Select [Vertical] or [Horizontal] under [Layout] after Insertion and
connections. (Initial setting: [Vertical])
≥If you do not select the [Layout] menu, the direction of operation of the
Cursor buttons will be different when using with the Horizontal layout.
ªPrecautions During Setup
As this printer gets hot during use, operate it in a well ventilated area.
Place printer at least 4" (10 cm) away from any walls to the left, right,
above or rear of printer. Do not place any objects on top of printer.
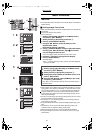
ªConnections
For Connection to TV
1 Connect the AC Power Cord (supplied) with the main
unit and AC outlet with the cord hooked to the cord
stopper.
2 Connect the Video cable (supplied) to [VIDEO OUT]
Socket on main unit and the Video Input Socket on TV.
≥After connections, turn on the Photo Printer and TV, and switch the
input to the video input.
For Connection to PC
1 Connect the AC Power Cord (supplied) with the main
unit and AC outlet with the cord hooked to the cord
stopper.
2 Connect the USB Connection Cable (not supplied) to the
USB Socket on main unit and the USB Socket on PC.
≥You can purchase a generic USB A-B cable to use with this product at
many consumer electronic retail outlets.
≥After connections, see page 31.
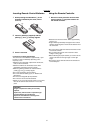
ªPaper That Can Be Used For Printing
The Photo Printer can use the following types of paper. Use Ink
Cassette/Paper Sets that bear the mark. (Print Sets that bear the
µ mark, the ∂ mark, or no mark at all cannot be used.)
≥4" x 5-7/8" (100 x 148 mm) printing paper* *with borders: The Ink
Cassette/Paper Set VW-APA50U is required.
≥16 Pre-Cut Adhesive paper (overcoat type): The Ink Cassette/Paper
Set VW-APASD16U is required.
≥4" x 6" (100 x 150 mm) printing paper* (overcoat type) *without
borders: The Ink Cassette/Paper Set VW-APKC36U is required.
≥Use the Ink Cassette with the paper provided in the same box.
THE SOCKET OUTLET SHALL BE INSTALLED NEAR THE
EQUIPMENT AND SHALL BE EASILY ACCESSIBLE
.