Care and Replacement
Maintenance
E
NGLISH - 47
Care and Replacement
Before Care and Replacement
Before cleaning, be sure to turn off the power and disconnect the power plug from the wall outlet.
z
(
Æ
page 19)
Be sure to turn off the power as described in “Switching off the projector”.
z
(
Æ
page 22)
Cleaning the projector
Cabinet
J
Wipe off dirt and dust gently with a soft cloth.
If it is difcult to remove the dirt, soak a cloth with water, wring the cloth well and then wipe the projector.
z
Dry off the projector with dry cloth.
Do not use petroleum benzine, thinner, any alcoholic solvent, kitchen detergents or chemical clothes.
z
Failure to observe these may result in altered or damaged surfaces of the projector.
J
Lens cover
Make sure no dirt or dust remains on the surface of the lens cover glass. It will be enlarged and projected onto
the screen.
Wipe off dirt and dust gently with a lint-free cloth. Do not wipe the lens cover with a cloth which has collected
dust.
Note
Clean the lens cover with special care. Giving a shock may cause serious damage.
z
J
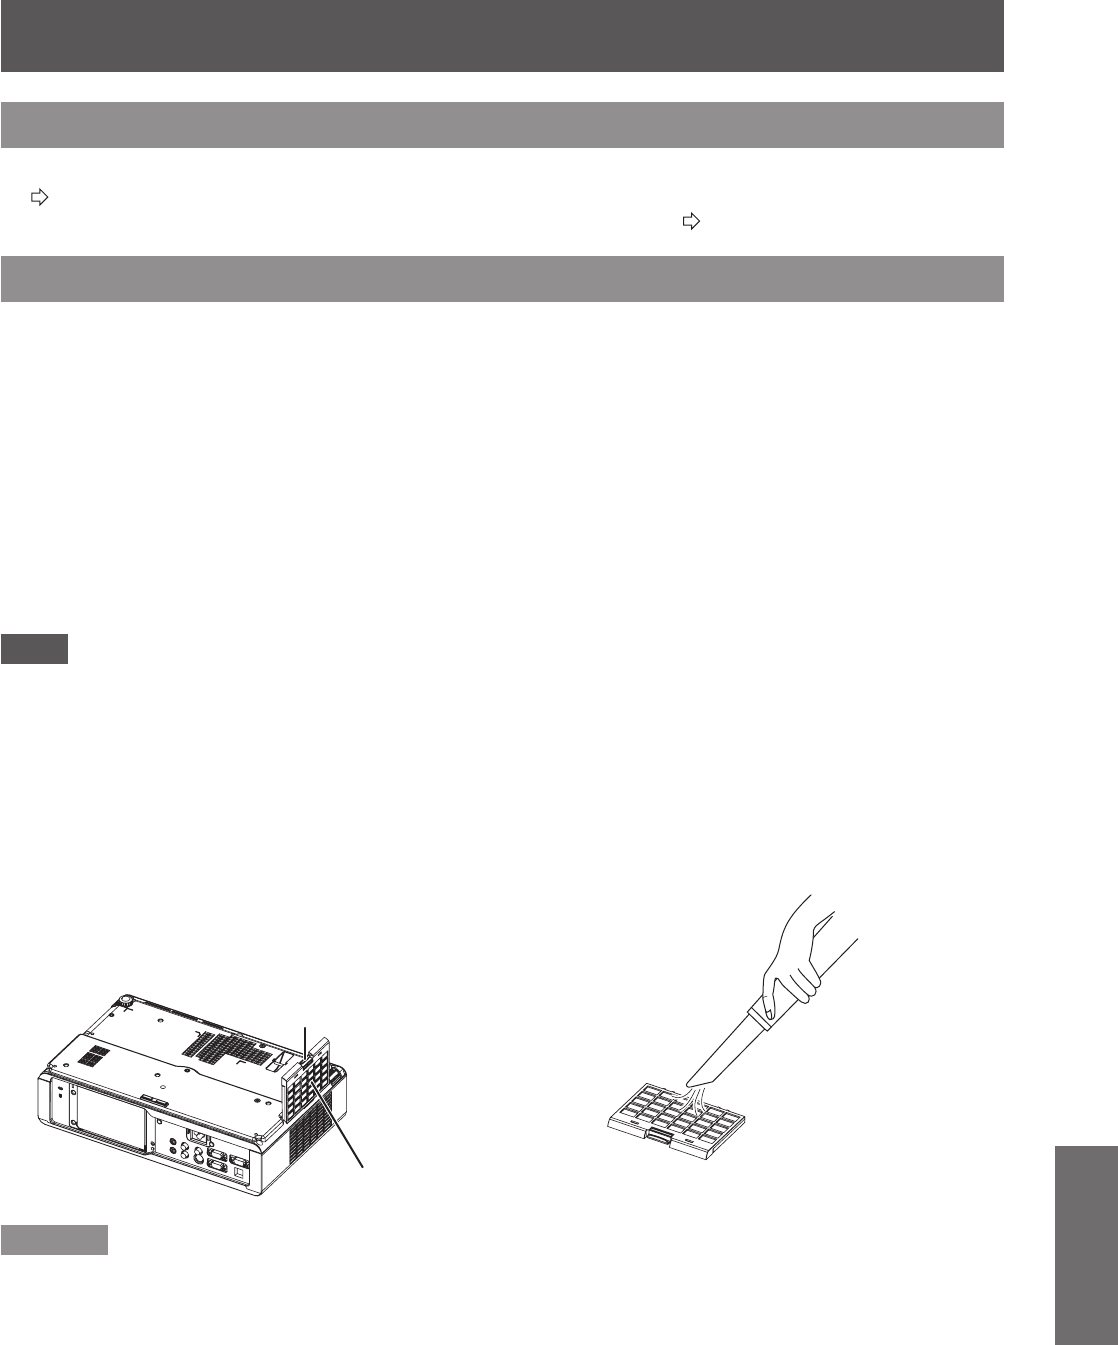
Air lter
If the air lter is excessively dirty, the internal temperature of the projector increases, the TEMP indicator
lights, and the power is turned off. If the power is turned off, the TEMP indicator ashes. Clean the air lter
regularly every 100 hours of usage.
1 ) Turn the projector upside down and place
it gently on a soft cloth.
Place the projector softly so that it will not be
z
damaged.
Press the tab and slightly slide up the air lter to
z
remove.
Tab
Air lter
2 ) Clean the air lter.
Vacuum dirt and dust from the air lter.
3 ) Install the air lter.
Remarks
Do not use the projector without attaching the air lter. Otherwise, it will suck in dirt and dust which can cause
z
malfunction.


