CREATING BAR CODES
21
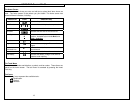
The Bar Code Tool
The bar code tool can be used for bin labeling, component identification, or asset
management and can be used in combination with other tools. The bar code tool
can be printed with or without a checksum digit or human readable text. The bar
code symbology available in the C
OUGAR™ LS9 is CODE 39.
Creating a Bar Code
The bar code tool should be accessed from the home screen. To access the bar
code tool:
1. Press the INSERT key to enter the tools menu.
2. Press the directional arrows to highlight the bar code tool.
3. Press the
key to select the bar code tool.
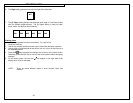
4. Press the right directional arrow key to input text. Type the text in the text
window. The bar code must include at least one digit of text.
5. Press the
key to accept the text.
6. Use the up or down directional arrow keys to highlight the other bar code
settings.
7. Use the right or left directional arrow keys to change the bar code settings.
8. Press the
key to accept all of the changes and to return to the home
screen. Otherwise, press the DEL key to return to the home screen without
accepting changes.
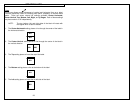
9. On the home screen, the bar code tool icon
will appear at the position of
the cursor.
Editing a Bar Code
To edit a bar code on the home screen, move the cursor directly to the left of the
bar code so that the icon is highlighted. Press the SHIFT key and then press the
INSERT key.
1. Press the right directional arrow key to input text. Type the text in the text
window. Quickly move to the far right by pressing the SHIFT key and then
the right directional arrow key. The bar code must include at least one digit
of text.
2. Press the
key to accept the text.
3. Use the up or down directional arrow keys to highlight the other bar code
settings.
4. Use the right or left directional arrow keys to change the bar code settings.
5. Press the
key to accept all of the changes and to return to the home
screen. Otherwise, press the DEL key to return to the home screen without
accepting changes.


