


Security
6-5
9161-A2-GH30-30
April 1998
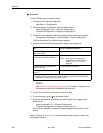
See
Limiting Async Terminal Direct Access
on page 6-1 if you want to limit
access to the dial-in session.
Refer to
Setting Up the Communication Port to Support an External Device
in
Chapter 5,
Setting Up
, for more information.
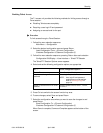
Controlling SNMP Access
The T1 access unit supports SNMP Version 1, which only provides limited
security through the use of community names. There are three methods for
limiting SNMP access:
H Disabling SNMP access.
H Assigning SNMP community names and access levels.
H Assigning IP addresses of NMSs that can access the unit.
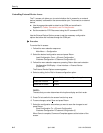
Disabling SNMP Access
The General SNMP Options screen provides the configuration option to disable
SNMP access to the unit. When this configuration option is disabled, the access
unit will not respond to any SNMP messages and will not send SNMP traps.
" Procedure
To disable SNMP access:
1. Follow this menu selection sequence:
Main Menu
→
Configuration
2. Select the desired configuration area and press Return.
Load Configuration From
→
[Current Configuration/
Customer Configuration 1/Customer Configuration 2]
3. Follow this menu selection sequence, pressing Return after each selection:
Configuration Edit/Display
→
Management and
Communication
→
General SNMP Management
The General SNMP Management Options screen appears.
4. Set the SNMP Management configuration option to Disable; Disable is the
factory default setting.
5. Press Ctrl-a to switch to the screen function key area.
6. To save changes, select S
ave and press Return.
7. Select the configuration area where you want to save the changes to and
press Return.
Save Configuration To
→
[Current Configuration/
Customer Configuration 1/Customer Configuration 2]
When Save is complete, Command Complete appears at the bottom of the
screen.