


Operation and Maintenance
8-5
9161-A2-GH30-30
April 1998
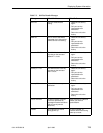
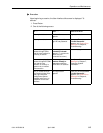
Supported SNMP Traps
A trap is an unsolicited message that is sent from the T1 access unit to the SNMP
trap manager when the T1 access unit detects certain prespecified conditions.
These traps enable the SNMP manager to gauge the state of the network.
The T1 access unit supports the following traps:
H warm-start
H authentication-failure
H enterprise-specific (those specific to T1 access unit)
H link-up
H link-down
Refer to Appendix D,
SNMP Cross-Reference
, for more information on traps.
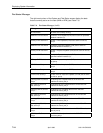
Dialing Out and Sending SNMP Traps
You can control whether generated SNMP trap messages will initiate a call if a
connection on the COM port external device has not already been established.
Use the Alarms Options screen to enable the T1 access unit’s automatic call
initiation (dial out) on the COM port external device to send an SNMP trap
message.
" Procedure
1. Assign SNMP Trap Managers. See
Setting Up SNMP NMS Security
in
Chapter 5,
Setting Up
.
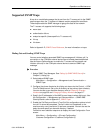
2. Select desired SNMP traps.
Main Menu
→
Configuration
→
Management and Communication
→
SNMP Traps
3. Configure the phone directories for dialing out alarms via the
Control
→
COM
Port Call Setup
branch. Set up the A directory as the primary alarm directory.
You can also set up an alternate directory; refer to
Displaying Directory
Numbers
on page 8-6 and
Changing Directory Numbers
on page 8-7.
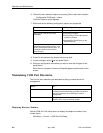
4. Specify the IP address(es) of the NMS to send traps to when dialing out. Use
the
Configuration
→
Management and Communication
→
SNMP NMS
Security
branch; refer to Appendix C,
SNMP Traps
.
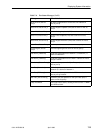
5. Enable the Call Retry and Alarm & Trap Dial-Out configuration options to hold
the call if it cannot be completed. The call is held until completed, or the
maximum retry count (maximum 5) has been exceeded. You can also set the
delay time and specify an alternate directory, if desired.
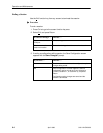
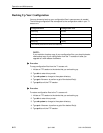
Follow this menu selection sequence to display the Load Configuration From
screen:
Main Menu
→
Configuration
→
[Current Configuration/
Customer Configuration 1/Customer Configuration 2]