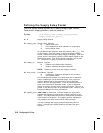
Defining the Supply Setup Packet
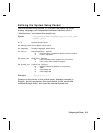
Use the supply setup packet (B) to select supply type, ribbon,
feed mode, supply position, and cut position.
Syntax
{I,B,supply_type,ribbon_on,feed_mode,
supply_posn,cut_posn p}
B1. B Supply Setup Packet
B2. supply_type Supply Type. Options:
0 Black mark stock
1 Die Cut/aperture stock (default for all printers)
2 Non-indexed stock
To use black mark supplies, send this packet {I,B,0,,,,, p}. Turn
off the printer. Turn the printer on while holding the FEED
button. Release when the supply starts to advance. After the
printer prints a test label, press the FEED button again to exit
Data Dump mode. Turn off the printer and then, turn it back
on. The printer is ready for black mark operation.
B3. ribbon_on Ribbon. Options:
0 Ribbon not installed (9414 default)
1 Ribbon installed (9412/9413 default)
NOTE: The 9414 printer does not support a ribbon.
B4. feed_mode Feed Mode. Options:
0 Continuous operation (default for all printers)
1 On-demand mode
For the 9412/9413 printers, you must have the on-demand
sensor installed to use on-demand mode. Also, the feed
mode is determined by the presence of the on-demand
sensor, not from this parameter. If the on-demand sensor is
open, you are using on-demand mode. If the on-demand
sensor is closed, you are using continuous mode. There is a
switch on the 9414 printer for on-demand mode. Refer to your
Equipment Manual for more information.
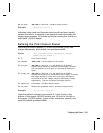
B5. supply_posn -300 to 300 in 1/203 inch. 0 is the default for all printers.
Adjusts the machine to print at the vertical 0,0 point on the
supply. This adjustment accounts for mechanical tolerances
from machine to machine. The supply position adjustment
only needs to be made on the initial machine setup.
You can’t change the supply position while the printer is
active. Changing the supply position will affect the print
position.
3-10 Configuring the Printer


