


Connecting to video equipment
General
–
You can connect up to two pieces of video equipment to the
projector following the illustrations below.
–
You can switch the input source to Video or S-Video when
you connect two pieces of equipment. (The S-Video
connection provides more vivid color and higher resolution
compared to the composite Video in
&
connection.)
–
You can output the sound of only one component through
the projector speaker even when two components are
connected. When connecting two external projectors, the
audio from either one of these projectors can be output from
the speaker of the projector. Audio can be turned on and off
for video related input (Video, S-Video) or Data (or YCbCr)
input from the menu (see SOUNDMUTE on page 20).
–
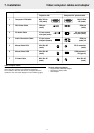
The figures in brackets like (2) correspond to the figures in
the accessories diagram.
The figures in circles like
#
correspond to the figures in fig.
2 of ‘Controls and connections’.
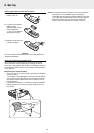
Caution!
Always switch off the projector before making any connections.
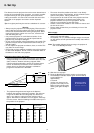
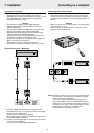
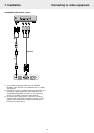
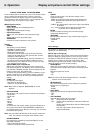
COMPOSITE VIDEO SIGNAL
1.
Connect the video OUT socket of a VCR, Laser Disc player,
video camera or TV to the Video in socket & of the projector.
For this, use the video connection cable
(2) (supplied).
2.
Connect the audio OUT L/R sockets of the VCR, Laser Disc
player, video camera or TV to the AUDIO socket # of the
projector.
For this, use the audio connection cable
(3)
and the audio
conversion cable
(4) (supplied)
.
Insert the white plug into the L socket and the red plug into
the R socket.
In case your VCR, Laser Disc player, video camera or TV is
equipped with a Scart connector (depending on region):
1.
Connect the Scart/RCA Audio Video adapter
(optional)
to the
Scart connector of the VCR, Laser Disc player, video camera
or TV.
2.
Plug the video/audio connection cables
(2, 3 and/or 4)
(supplied)
into both the adapter and the Video socket & and
Audio socket # of the projector.
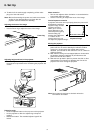
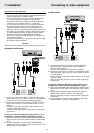
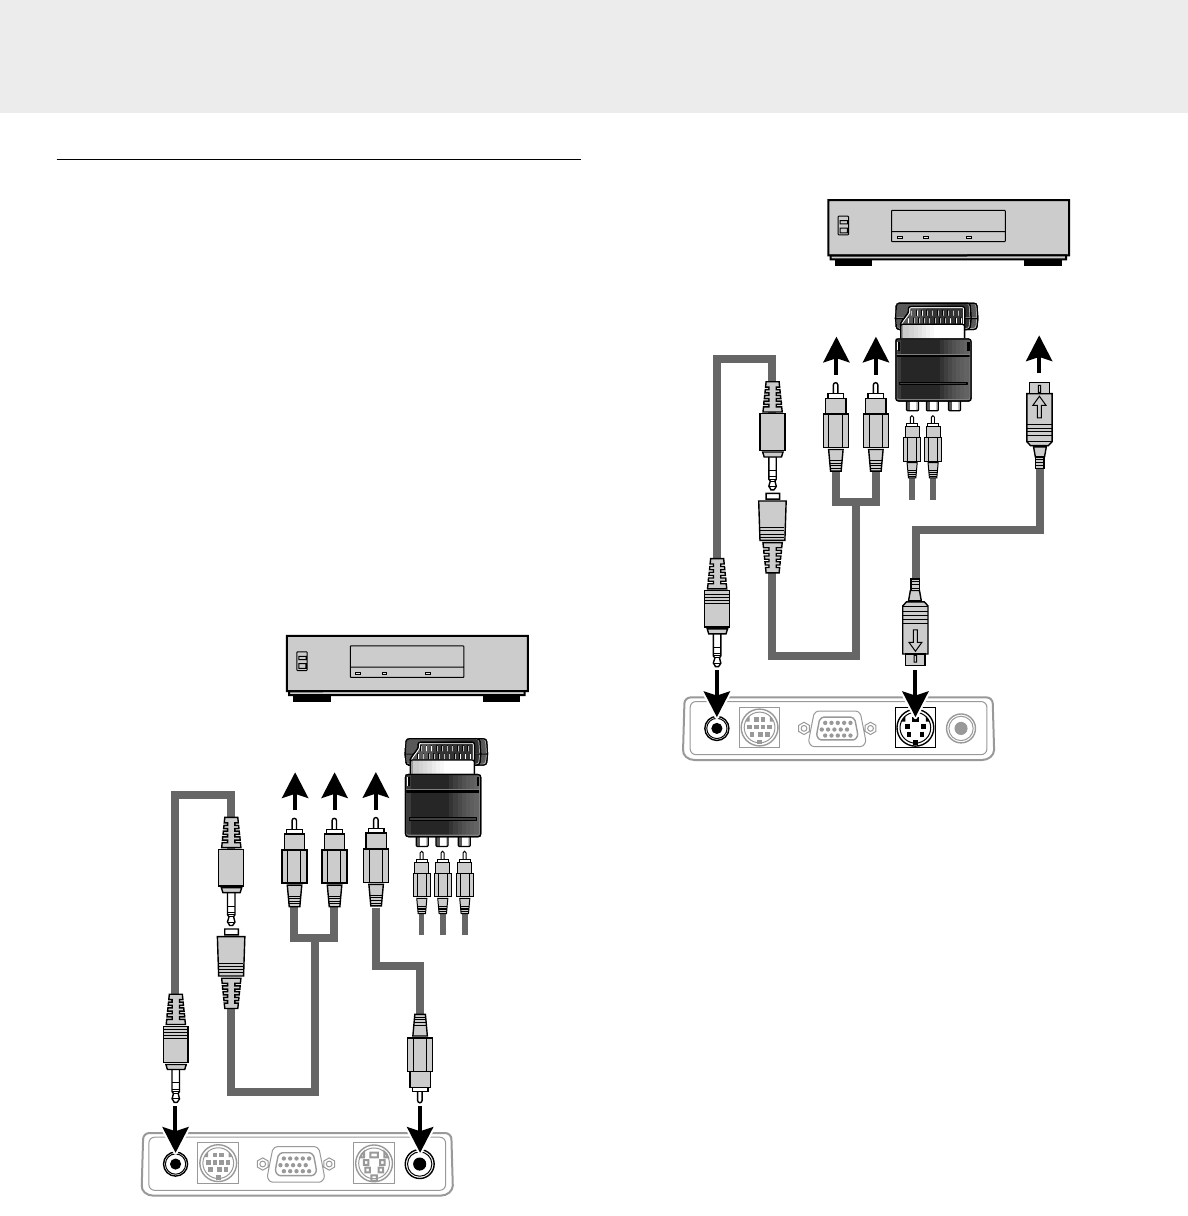
S-VIDEO SIGNAL
1.
Connect the S-Video OUT socket of a S-VHS VCR, DVD,
Laser Disc player, video camera or TV to the S-Video in
socket ^ of the projector.
For this use the S-Video connection cable
(supplied)
.
2.
Connect the audio OUT L/R sockets of the S-VHS VCR, DVD,
Laser Disc player, video camera or TV to the Audio in socket
# of the projector.
For this, use the red and white audio connectors of the audio
conversion cable.
Insert the white plug into the L socket and the red plug into
the R socket.
In case your VCR, Laser Disc player, video camera or TV is
equipped with a Scart connector (depending on region):
1.
Connect the Scart/RCA Audio Video adapter
(optional)
to the
Scart connector of the VCR, Laser Disc player, video camera
or TV.
2.
Plug the audio connection cables
(supplied)
into both the
adapter and the Audio in socket # of the projector.
Insert the white plug into the L socket and the red plug into
the R socket.
3.
Plug the S-Video connection cable
(supplied)
into the VCR
and the S-Video in socket ^ of the projector.
Audio in Mouse Data
/
YCbCr
Video inS-Video in
Audio in Mouse Data
/
YCbCr
Video inS-Video in
7. Installation
13
Connecting to video equipment
(3)
(4)
(2)
(3)
(4)
(7)
#
&
Scart adapter
(optional)
#
^
Scart adapter
(optional)