


Preparation
About Your Projector
ENGLISH - 12
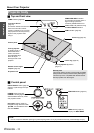
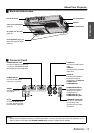
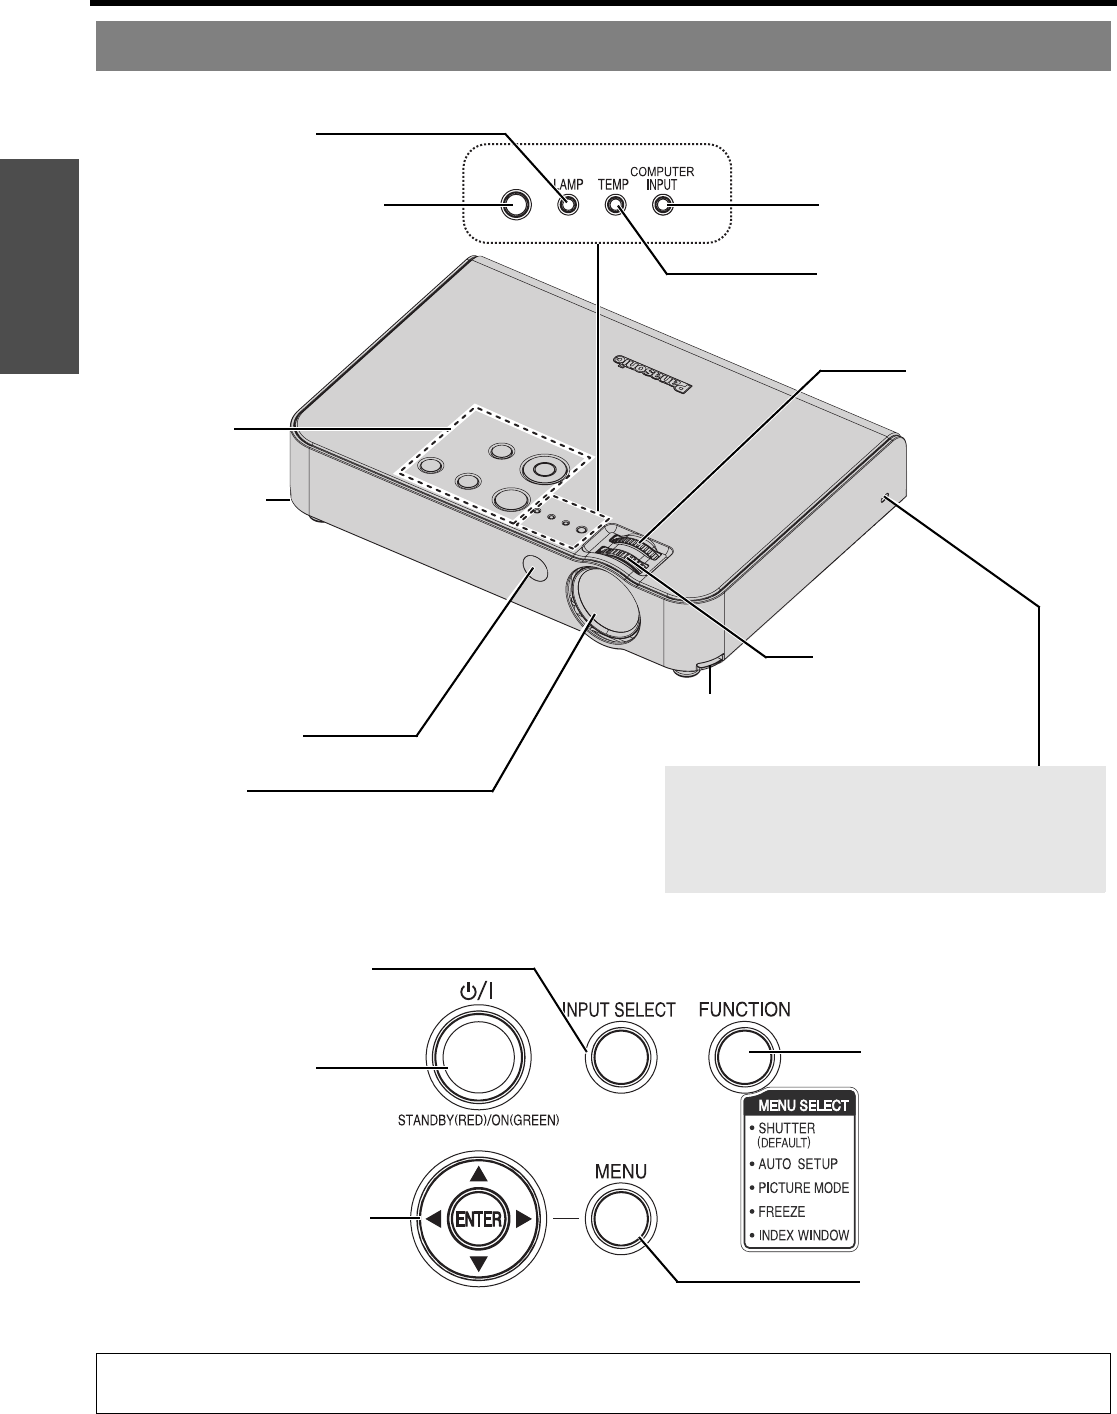
J Top and front view
Projector body
NOTE:
• Do not cover the ventilation openings or place anything within 15 cm (6") of them as this may cause damage or injury.
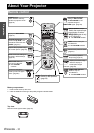
MENU button (page 27)
Display the MAIN MENU.
POWER button (page 20)
POWER indicator (page 20)
Switch between stand-by mode
and projection mode.
Navigation buttons (page 27)
Navigate through the menus with
FGIH, and activate the menu
item with ENTER.
FUNCTION button (page 34)
INPUT SELECT button (page 22)
Switch to cycle through the input
method.
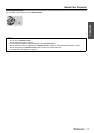
Focus ring (page 22)
J Control panel
Zoom ring (page 22)
Font leg adjuster
(L) button (page 17)
These buttons are
used to unlock the
front adjustable legs.
Press to adjust
the angle of tilt of the
projector.
Control panel
Security lock
This can be used to connect a commercially-available
theft-prevention cable (manufactured by Kensington).
This security lock is compatible with the Microsaver
Security System from Kensington.
Luminance Sensor
(page 31)
This sensor detects the luminance
when the “DAYLIGHT VIEW”
function is operating. Do not cover
the projector and do not place any
object on the projector when
using it.
TEMP indicator (page 39)
COMPUTER INPUT indicator
This indicator illuminates when a
signal is being input to the
connector (COMPUTER1 IN or
COMPUTER 2 IN) selected using
the INPUT SELECT buttons.
LAMP indicator (page 39)
Projection lens
Remote control signal
receptor (page 23)
Font leg adjuster (R) button
(page 17)