


ENGLISH - 23
Basic Operation
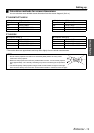
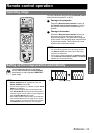
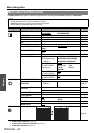
Remote control operation
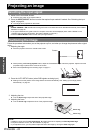
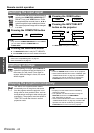
You can operate the projector with the Remote control
within the remote range 15 m (49'2").
Q Facing to the projector
Ensure the Remote control emitter is facing to
the Remote control signal receptor on front of
the projector and press the required buttons to
operate.
Q Facing to the screen
Ensure the Remote control emitter is facing to
the screen and press the required buttons to
operate the projector. The signal will be reflected
off the screen. The operating range may differ due
to the screen material. This function may not be
effective with a translucent screen.
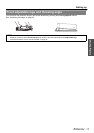
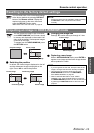
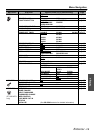
You can adjust the setting of the image
position, DOT CLOCK and CLOCK PHASE
automatically for the projected COMPUTER
signal image.
Operating range
AUTO
SETUP
INPUT
SELECT
COMPUTER WIRELESS VIDEO
WIRELESS
PRESENTATION
PAGE
MENU
ENTER
FREEZE SHUTTER
COMPUTER
SEARCH
DEFAULT
INDEX-
WINDOW
MULTI-LIVE
DIGITAL ZOOM VOLUME
RETURN
NOTE:
• Do not let strong light shine onto the signal receptor.
The Remote control may malfunction under strong
light such as fluorescent.
• If there are any obstacles between the Remote control
and the Remote control signal receptor, the Remote
control may not operate correctly.
Setting up the image position automatically
NOTE:
• SIGNAL SEARCH will be adjusted only when the
SIGNAL SEARCH is set to ON.
• If the dot clock frequency is 100 MHz or higher, AUTO
SETUP is not effective.
• If the projected image is dark or blurred around the
edge, AUTO SETUP may stop the processing before
complete. Project a much clearer or lighter image and
press the AUTO SETUP button again.
• When FUNCTION BUTTON is set to "AUTO SETUP"
(see “FUNCTION BUTTON” on page 34), the AUTO
SETUP operation can also be carried out by pressing
the FUNCTION button at the front of the projector.
Screen Projected image