ENGLISH - 22
Basic Operation
Projecting an image
1. Switch on the connected devices.
Press the play button of the required device.
2. Press the INPUT SELECT buttons to select the required input method if needed. See “Switching the input
signal” on page 24.
The image will be projected on the screen.
Follow the procedure below when you set the projector up first, and when you change the placement after original
setup.
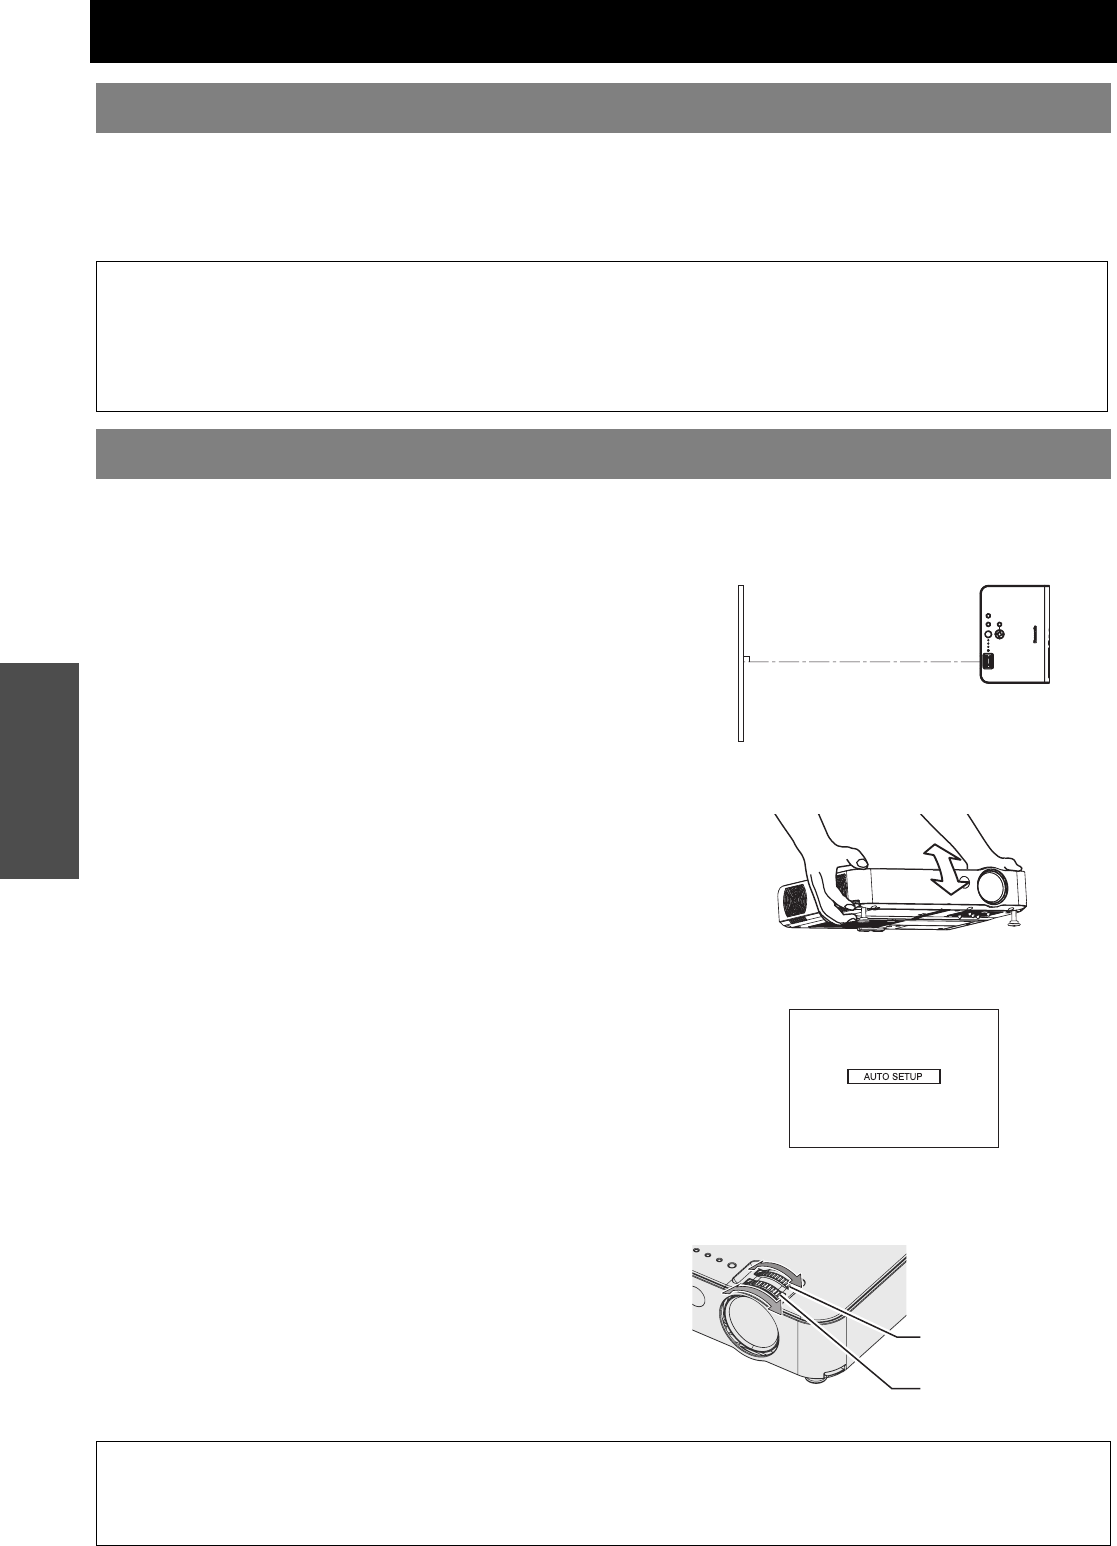
1. Adjusting the angle.
Place the projector so that it is vertical to the screen.
While pressing the Front leg adjuster button, adjust the forward/back angle of tilt of the projector. Adjust so that the
projected image is placed at the center of the screen.
See “Front adjustable legs and throwing angle” on page 17.
2. Press the AUTO SETUP button (when RGB signals are being input).
Settings such as the position of the image will be corrected automatically. See “Setting up the image position
automatically” on page 23.
3. Adjusting the size.
Turn the Zoom ring to adjust the size of the projected image.
4. Adjusting the focus.
Turn the Focus ring to adjust the focus of the projected image.
Selecting the input signal
NOTE:
• SIGNAL SEARCH is ON as default and the signal from the connected devices is detected automatically. See “SIGNAL
SEARCH” on page 35.
• If no signal is detected, the guide screen for computer connection will be displayed (when “INPUT GUIDE” in the
“OPTION” menu is set to “DETAILED”. See “INPUT GUIDE” on page 34.)
• Press the INPUT SELECT button to finish the input signal search.
Positioning the image
NOTE:
• Heated air comes out of the Air exhaust port. Be careful of this when adjusting the Font adjustable legs.
• If keystone distortion occurs, see “KEYSTONE” on page 32.
• If you adjust the focus, you may need to adjust the size of the image by moving the Zoom ring again.
Screen
Zoom ring
Focus ring


