10 ENGLISH
Installing
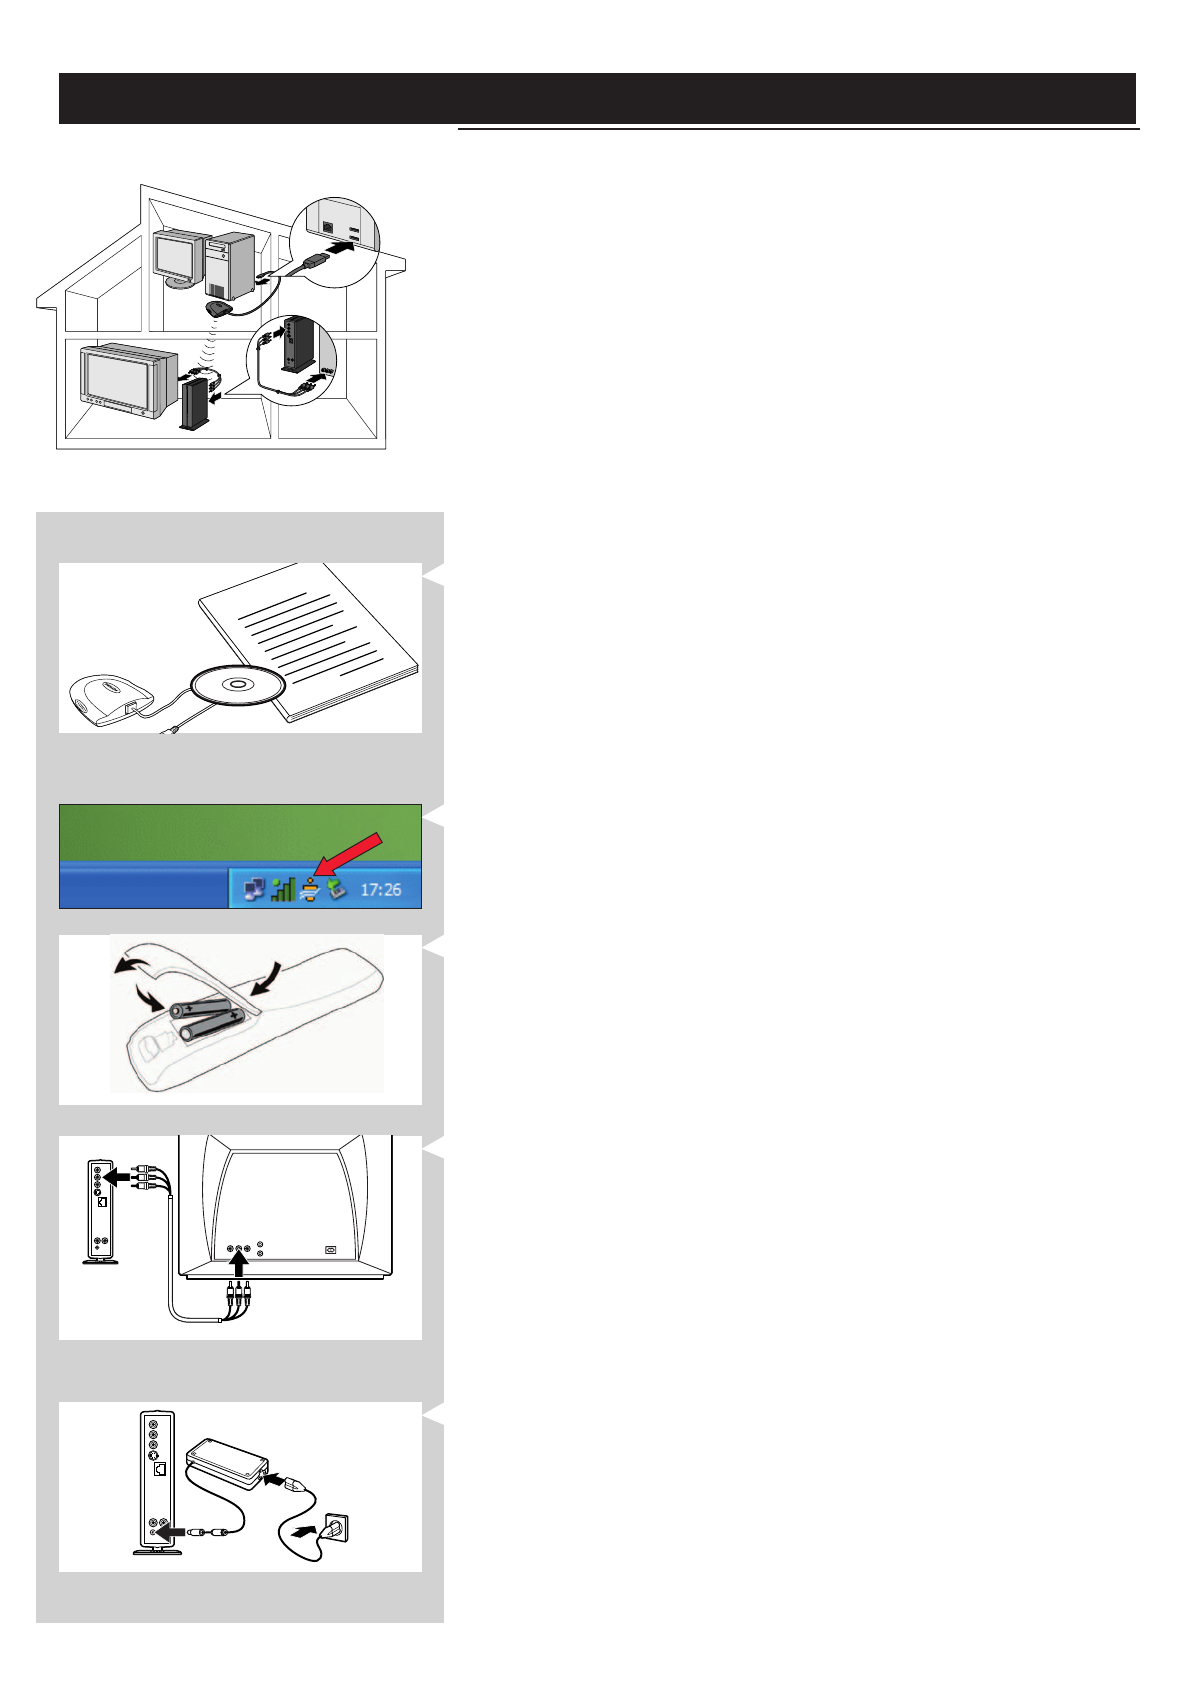
2.1 If you do not have a wireless computer network
Option A
In this configuration you only have a computer and a TV.
•You will install a Wireless Network Adapter on your computer.
•You will connect the SL300i to the TV.
At the end, you will be able to send music, movies, and pictures from your computer to
your TV or stereo.
1 Install a Wireless Network Adapter (not included, you will have to buy one separately.
E.g. the Philips CPWUA054.)
See the separate instructions of the Wireless Network Adapter on how to
install the adapter on your PC.
Note: Choose ‘Ad-Hoc’ as your network type during installation, and set "philips" as your wireless
network name (SSID).
After the Wireless Network Adapter has been installed successfully, continue below.
2 Make sure the Philips Media Manager you installed in chapter 1 is active.
Double-click the Media Manager icon in the lower right corner of your monitor.
Or click Start / Programs / Philips Media Manager.
Leave the Media Manager window open to be sure it is active.
3 Put the batteries into the remote control.
See ‘Remote Control - Placing batteries’ on page 28 in the extended User Manual on
CD-ROM if you need more information on how to do this.
4 Connect the Audio + Composite video cable to the audio and video outputs of the
SL300i and to your TV.
Use the yellow connectors of the Audio + Composite Video cable to connect the CBVS
Video output of the SL300i to the Composite Video (CBVS) input of your TV.
> This will enable you to view the user menus and multimedia content on the television
screen.
Use the white and red connectors of the Audio + Composite Video cable to connect the
Left/Right Audio output of the SL300i to the Audio inputs of your TV (white for left, red
for right).
Option: connect the SL300i to an audio set using the second audio outputs 2.
5 Connect the power adapter between the DC-in input 7 of the SL300i and a mains
socket.
> The indicator in the Power button lights up blue when the SL300i is connected to the
mains.
How to use...
I
n
s
t
a
l
l
a
t
i
o
n
C
D


