


Remote Monitoring Network Setup
Planar UltraRes User Manual 65
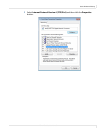
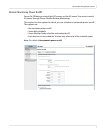
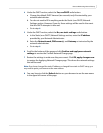
4 Under the DHCP section, select the Yes, use DHCP radio button.
a Change the default DHCP timeout (ten seconds) only if instructed by your
network administrator.
b You do not need to fill in anything under the Static (non-DHCP) Network
Settings section. However, if you do, these settings will be used in the event
that the DHCP attempts to time out.
c Go to step 6.
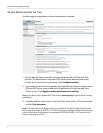
5 Under the DHCP section, select the No, use static settings radio button.
a In the Static (non-DHCP) Network Settings section, enter the IP address
provided by your Network Administrator.
b Enter the Network mask, DNS server(s), and Gateway as instructed by the
network administrator.
c Go to step 6.
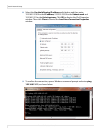
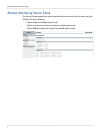
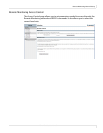
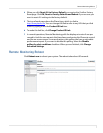
6 Scroll to the bottom of the page and click Confirm and apply new network
settings to receive the Confirm Network Change page.
7 Review the settings to make sure they are correct. Click OK, apply changes now
to receive the Applying Network Changes page. This shows the network settings
that will be used.
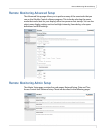
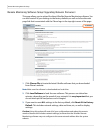
Note: If you have changed the static IP address or changed from static to DHCP setup, you
may need to point your browser at the new address.
8
You may have to click the Refresh button on your browser to see the new name
in the upper left corner of the page.