E – 15
–
+
U
P
E
N
T
E
R
D
O
W
N
P
O
W
E
R
S
T
A
T
U
S
M
E
N
U
S
E
L
E
C
T
STATUS
POWER
Using the unit
Operation
Before starting
• Remove the lens cap from the lens. Please keep it because it must
be replaced after use.
• Don’t use the unit in a bright room and don’t expose the screen to
direct sunlight or other strong light sources.
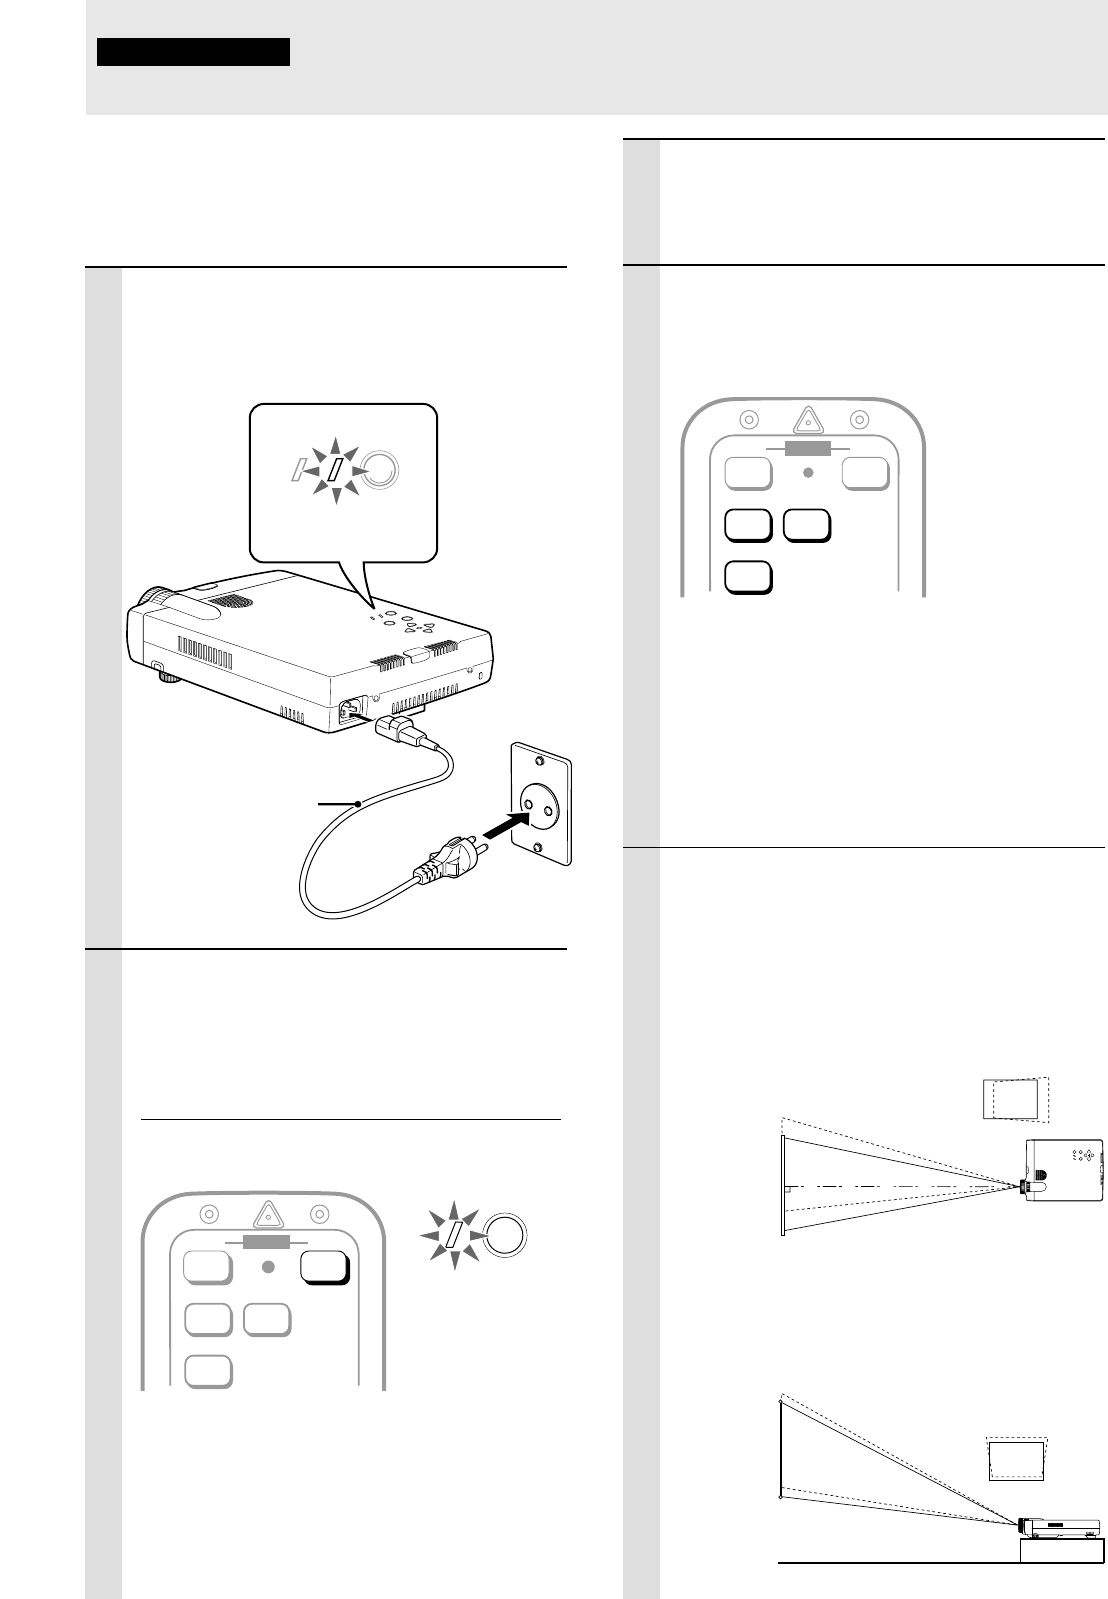
1 Connect the supplied power cable to the
unit, then to the wall outlet (the mains).
The POWER indicator on top of the unit lights in
amber.
2 Press POWER ON on the remote control,
or POWER on top of the unit, to turn on
the unit.
The POWER indicator on top of the unit turns to
green and starts flashing.
It takes one minute for the unit to be ready for use.
Wait until the indicator stops flashing and lights
steadily in green.
Note
While the POWER indicator is flashing, the unit doesn’t turn
off even if you press POWER OFF on the remote control, or
POWER on the unit.
Tip
If you set “AUTO START” to “ON” in the menu (see page 29),
the unit will turn on automatically after connecting the power
cable in step 1.
Lights in amber
(Standby)
2
1
Power cable
(supplied)
Green light flashes
(About one minute)
↓
Then lights steadily
in green
3 Turn on the connected source (computer,
VCR, DVD player, etc.).
If you use a video component, start playback for
screen/image adjustment.
4 Press either VIDEO, S-VIDEO, or RGB to
select the input source.
You can also select the input source with the
menu operation (see page 23).
Notes
• If the blue or black screen (the background type differs
depending on the “BACKGROUND” setting. See page 25.)
is projected, check the following:
– Is the source properly connected to the unit?
– Is the source component or computer turned on?
– Are the video signals coming to the unit?
• The video resolution of the connected computer can be
changed. See page 18.
5 Adjust the position and height of the unit.
Move the unit to the position where the projected
image is horizontally centered to the screen.
• When the projected image is offset
horizontally
Adjust the position of the unit so that the unit is
square to the screen.
• When the projected image is offset ver-
tically
Adjust the height balance of the unit with the
adjusters. See next page.
Screen
View from the top
Screen
Side view
POWER
(Continued on next page.)
VIDEO
RGB
S-VIDEO
OFF ONPOWERPOWER
VIDEO
RGB
S-VIDEO
OFF ONPOWERPOWER
