E – 28
Selecting the
picture type
Selecting the brightness or color oriented image
setting
The brightness oriented setting may be suitable for PC images and
the color oriented setting may be suitable for movie pictures. In this
way, you can focus on either brightness or color.
This setting is applied to all input sources regardless of the present
input source.
1 Press MENU to display the main menu.
2 Press the cursor / keys to select “SETTING MENU.”
3 Press L-CLICK to display the SETTING MENU.
4 Press the cursor / keys to select “WHITE PICTURE,”
then press the cursor +/– keys to select the white picture
mode.
The following two types can be selected:
• NORMAL to set the unit to the brightness oriented
setting or
• QUIET to reduce brightness for better color expression,
5 Press L-CLICK to confirm the setting.
Selecting the color preference
After selecting the brightness or color oriented image setting, you
can set the color preference individually for each input source
according to the video content and your preferences.
1 Select the input source (see page 15 or 23).
2 Press MENU to display the main menu.
3 Press the cursor / keys to select “IMAGE ADJ
MENU.”
4 Press L-CLICK to display the IMAGE ADJ MENU.
5 Press the cursor / keys to select “IMAGE MODE,”
then press the cursor +/– keys to select the gamma mode.
The following three types of gamma modes can be se-
lected according to your preferences:
• NORMAL,
• NATURAL 1, or
• NATURAL 2.
Adjusting the
picture elements
The picture elements such as brightness, contrast, white balance,
and so on can be adjusted individually for each input source. The
adjustable items vary depending on the input source.
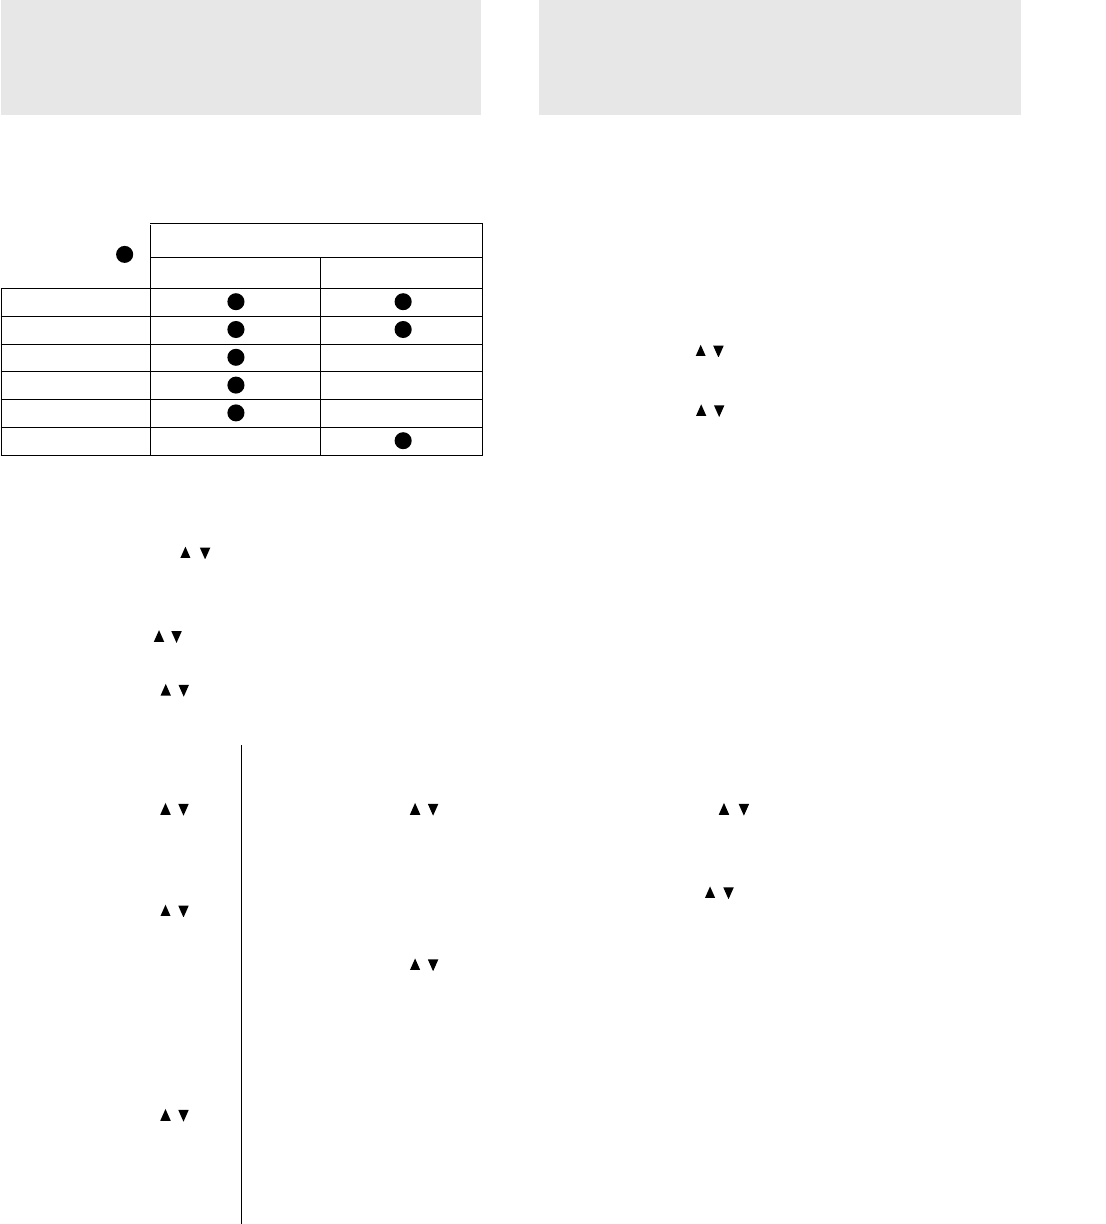
BRIGHTNESS
CONTRAST
COLOR –
TINT –
SHARPNESS –
WHITE BALANCE –
1 Select the input source (see page 15 or 23).
2 Press MENU to display the main menu.
3 Press the cursor / keys to select “IMAGE ADJ
MENU.”
4 Press L-CLICK to display the IMAGE ADJ MENU.
5 Press the cursor / keys to select “BRIGHTNESS,” then
press the cursor +/– keys to adjust the brightness.
6 Press the cursor / keys to select “CONTRAST,” then
press the cursor +/– keys to adjust the contrast.
(The elements
marked with “
”
are adjustable.)
Input source
VIDEO/S-VIDEO RGB
When the input source
is RGB
7 Press the cursor / keys
to select “WHITE BAL-
ANCE,” then press L-
CLICK.
The WHITE BALANCE
menu appears.
8 Press the cursor / keys
to select each item in the
WHITE BALANCE
menu, then press the cur-
sor +/– keys to adjust the
item for the white color
balance.
When the input source
is VIDEO or S-VIDEO
7 Press the cursor / keys
to select “COLOR,” then
press the cursor +/– keys
to adjust the color.
8 Press the cursor / keys
to select “TINT,” then
press the cursor +/– keys
to adjust the tint.
Note
The tint control doesn’t oper-
ate with a PAL or SECAM
source.
9 Press the cursor / keys
to select “SHARPNESS,”
then press the cursor +/–
keys to adjust the sharp-
ness.


