E – 16
Using the unit (continued)
–
+
UP
ENTER
D
O
W
N
POWER
STATUS
MENU
SELECT
PC
A
U
D
IO
R
G
B
IN
M
O
U
SE
AU
DI
O
S
-V
ID
EO
V
ID
EO
L
/
M
O
N
O
R
Up
Down
Focus ring
Up
Down
5
4
3
2
1
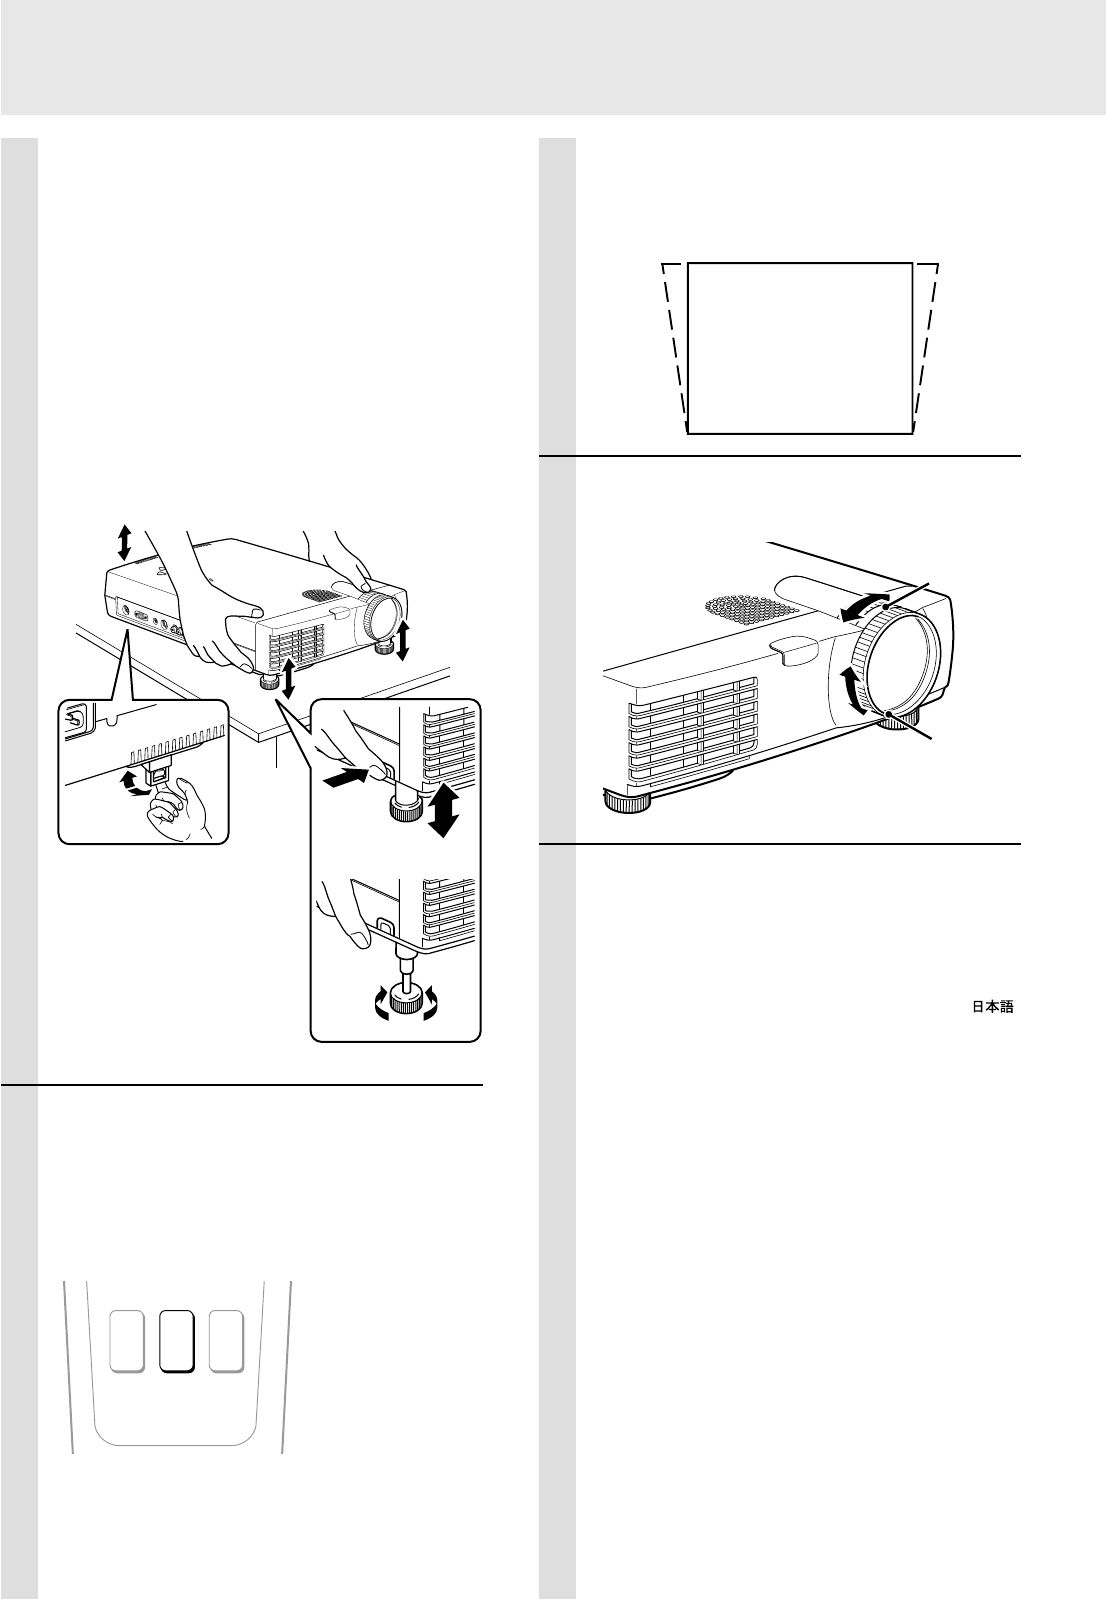
Using the adjusters to adjust the height balance
There are two front adjusters and one rear adjuster.
1 If you need to lower the position of the projected
image, pull out the leg of the rear adjuster.
2 Hold the front sides of the unit, then adjust the
height of the projected image.
While adjusting the height, the rear adjuster should remain
on the table.
3 Press the left and right buttons by the front ad-
justers at the same time to loosen the adjuster
legs.
The front adjuster legs will loosen and be extended.
4 Release the buttons to fix the position of the front
adjuster legs.
5 To fine-adjust the height and balance, turn each
foot of the front adjuster legs.
6 (If the vertical offset cannot be adjusted
completely with the adjusters)
Press KEYSTONE + or – to correct the
offset (keystoning) image.
You can also correct the keystoning effect with
the menu operation (see page 24).
Note
The maximum correction value is 29° including the optical
correction value.
Zoom ring
PLUS
MAGNIFY KEYSTONE VOLUME
+
–
+
–
+
–
→←
Adjusting the distorted picture
The upper distortion of the picture will be corrected as you see
the illustration below.
The menu screen shape is not changed by the keystone
correction even when displayed.
7 Adjust the image size with the zoom ring,
then adjust the focus with the focus ring.
8 Change the unit setting to suit the
method and source selected in step 4.
The following settings can be made using the
menu operation.
The menu can be displayed in English, Deutsch,
Français, Italiano, Español, Svenska, or .
(The standard setting is English.) See page 24.
• For basic menu operation, see page 23.
• To see an overview of the menu structure, see
page 22.
• Select the type of projection
If the projected image is horizontally reversed
or upside down, change the projection type.
See page 24.
• When the input source is VIDEO or S-
VIDEO
Select the color system. See page 24.
• When the input source is RGB
Adjust the projected image from the computer.
The resolution most suitable for the incoming
signals is automatically selected.
However, if any vertical banding, noise, dot
interference, or crosstalk appears on the
screen, manually adjust “PICTURE ADJ,” then
“FINE PICTURE” using the menus. See page
27.
