


15
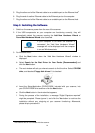
4. For Windows XP:
a. Insert the Setup/Application CD/DVD-ROM, included with your scanner, into
your CD/DVD-ROM drive.
b. Select Install the software automatically recommended and click the Next
button.
c. Click the Next button in the window that appears. Afterwards, please skip to
procedure 8.
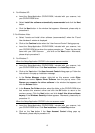
5. For Windows Vista:
a. Select “Locate and install driver software (recommended)” when the “Found
New Hardware” window is displayed.
b. Click on the Continue button when the “User Account Control” dialog pops up.
c. Insert the Setup/Application CD/DVD-ROM, included with your scanner, into
your CD/DVD-ROM drive when the system prompts you Insert the disc that
came with your USB Scanner and click on the Next button. Afterwards,
please skip to procedure 9.
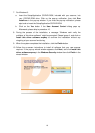
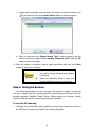
6. For Windows 7:
When the Setup/Application CD/DVD is for several scanner models
a. Insert the Setup/Application CD/DVD-ROM, included with your scanner, into
your CD/DVD-ROM drive. Click Run install.exe in the AutoPlay window.
b. Click on the Yes button if the User Account Control dialog pops up. Follow the
instructions in the pop-up installation message.
c. In the Device Manager window, right-click on this scanner under Other
devices and select Update Driver Software from the pop-up menu. Click
Browse my computer for driver software in the window that appears, and
click the Browse button.
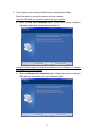
d. In the Browse For Folder window, select the folder or the CD/DVD-ROM drive
that contains this scanner’s driver and click the OK button to return to the
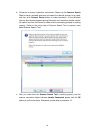
previous screen. Click the Next button and click Install this driver software
anyway if the Windows Security window appears. Afterwards, please skip to
procedure 10.
When the Setup/Application CD/DVD is for one scanner model
a. Insert the Setup/Application CD/DVD-ROM, included with your scanner, into
your CD/DVD-ROM drive. Click Run install.exe in the AutoPlay window.
b. Click on the Yes button if the User Account Control dialog pops up.
Afterwards, please skip to procedure 10.