2 -
4
• Turn the knob counterclockwise to remove slack in ribbon for
use.
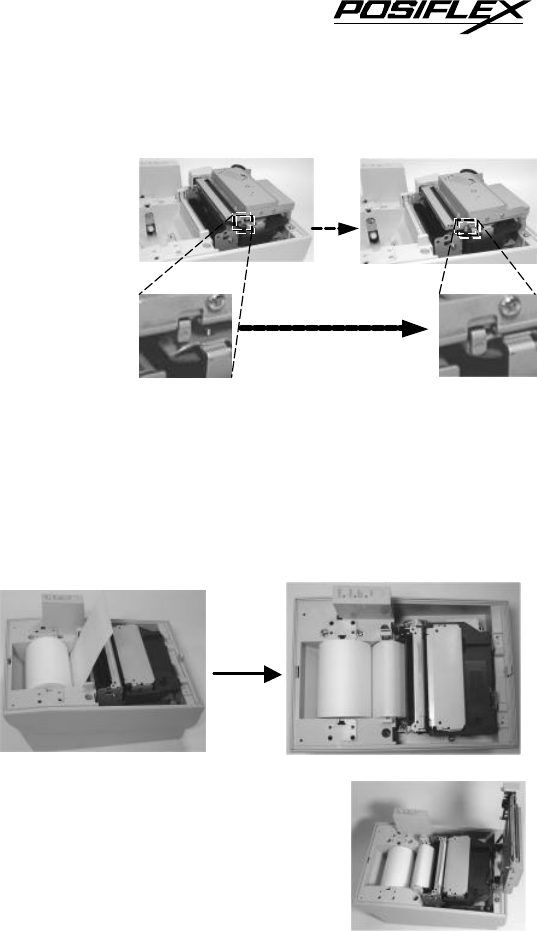
• Apply even force
to close the auto
cutter (PP5600B)
so that the small
lug of auto cutter
can seat in right
position on the
bracket of the
print mechanism
as in the picture.
• Close the top cover by fitting its rear end lug first for ribbon
replacement only or go on loading paper as in next paragraph.
C. LOADING PAPER
1. Drop the paper roll inside the paper compartment in the
orientation as shown in left picture below.
2. Cut the leading edge of paper roll perpendicular to paper
direction and now please turn on the
power to the printer by pressing the
power button in front side of the
printer. Insert the leading end of the
paper roll into the paper intake slot on
print mechanism. Insert the paper till
you feel the front end caught by the
Seat lug outside
bracket below
š
Î


