Setting Up the Software
3.2.2 Setting Up the E10A-USB Emulator
Rev. 1.01 May 7, 2008
3-13
REJ11J0015-0101
3
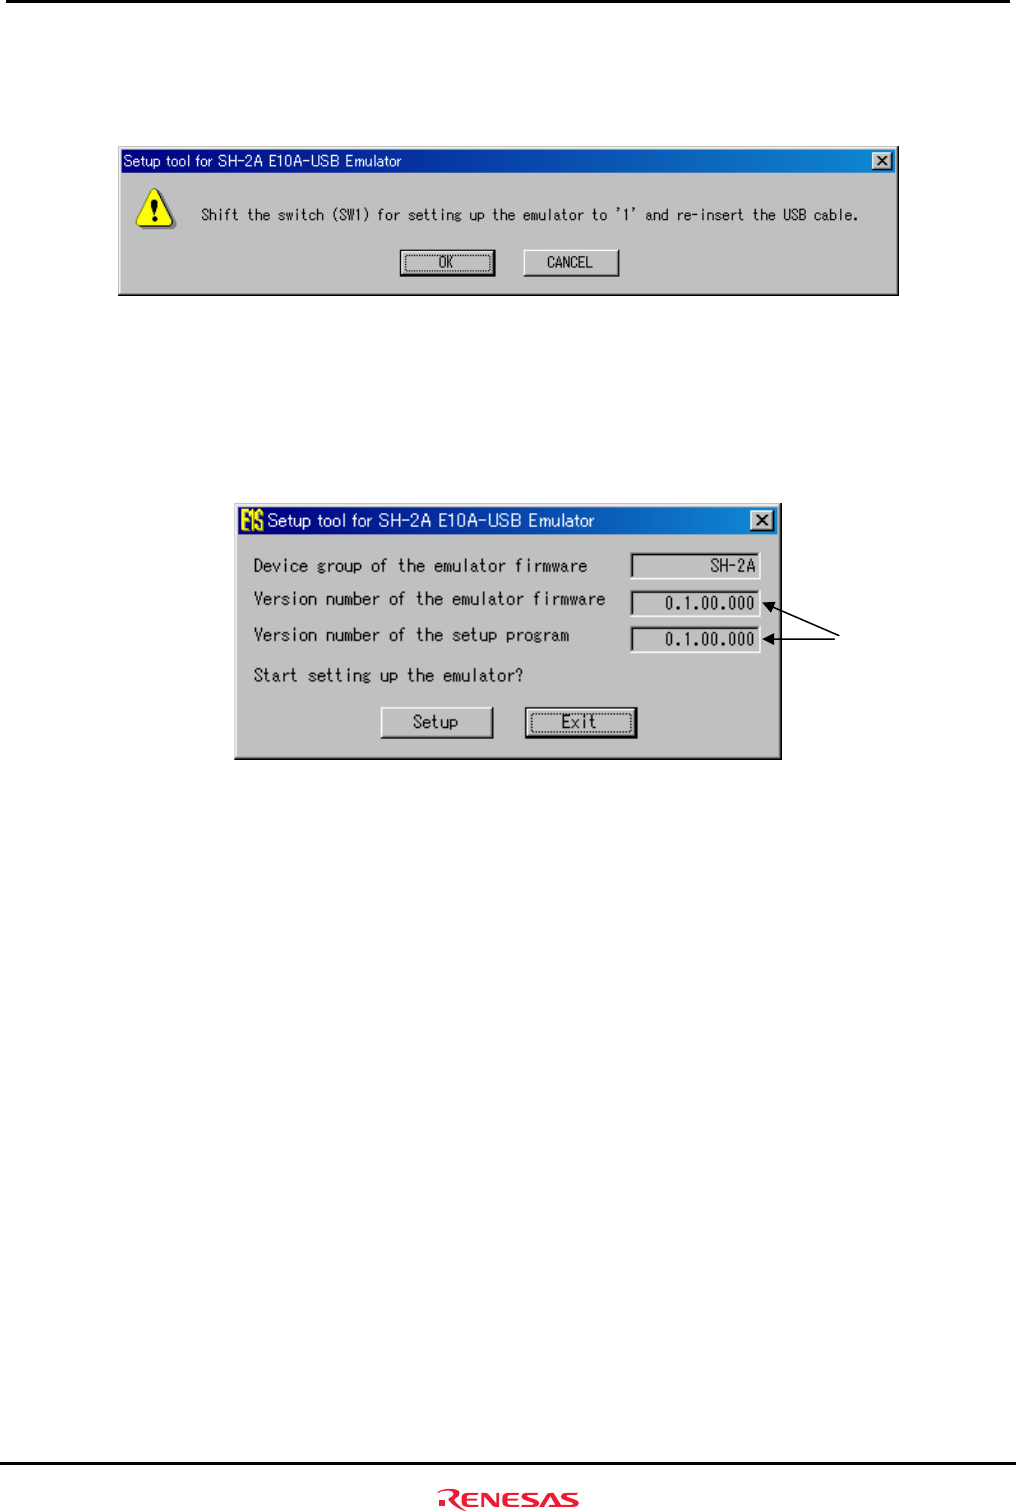
(6) After the E10A-USB emulator setup is completed, the message shown below will be displayed.
Set the emulator setup switch (SW1) to the “1” side, and temporarily remove the USB cable and plug it in back again.
Then click “OK”.
Figure3.2.15 Setup Tool for SH-2A E10A-USB Emulator Dialog Box
Note: Always make sure the emulator setup switch (SW1) remains in the “1” side unless the setup tool is used.
(7) The dialog box shown below will be displayed again, so check it to see that you now have the latest version of
firmware installed, and click “Exit”. Then you’ve finished setting up new firmware.
Version numbers
Figure3.2.16 E10A-USB Emulator Setup Tool at Completion
Note: The version numbers differ with each device group supported by the E10A-USB emulator.


