Using the Print Job List
83
4
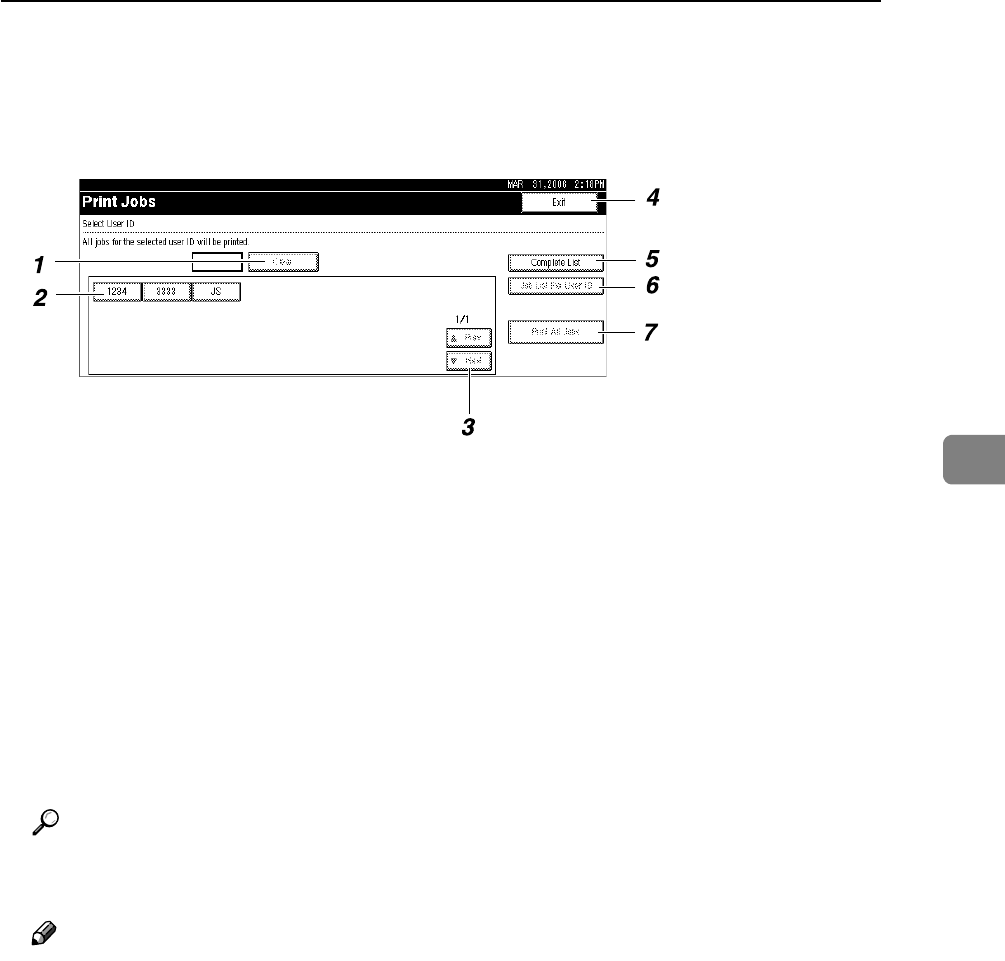
❖ List Per User ID
If you select [List Per User ID] from [Initial Print Job List] (see p.80 “Selecting
the Initial Print Job List”), the following screen appears:
1. [Clear]
Deselects a selection.
2. User ID
Displays user IDs who sent files to the
machine.
3. [UPrev.] / [TNext.]
If the list of files does not fit on the
screen, scroll down to view the list.
4. [Exit]
Returns to the Printer screen.
5. [Complete List]
Displays all print jobs.
6. [Job List Per User ID]
Displays the print job list of each ID.
7. [Print All Jobs]
Prints all documents of the desired ID.
If a user sends a different type of print
jobs in the same ID, you can select
which type of a print job to print.
Reference
For details about printing from the List Per User ID screen, see p.80 “Se-
lecting the Initial Print Job List”.
Note
❒ The display is not updated if a new file is stored while the list of stored files
is displayed. To update the display, press [Exit] to return to the Printer
screen, and then press [Print Jobs] again.
❒ If a large number of print jobs are stored in the machine, processing may
slow temporarily, depending on which functions are used.
❒ If you select [Complete List] from [Initial Print Job List] and press [Per User ID]
in the Complete List screen, the screen switches to the List Per User ID
screen where [Back] appears at the bottom right. Press [Back] or [Complete
List] to switch to the Complete List screen. When you select [List Per User ID]
from [Initial Print Job List], [Back] does not appear in the List Per User ID
screen. Press [Complete List] to switch to the List Per User ID screen.
❒ To store files in the machine, you can use the Document Server as well as
Sample Print, Locked Print, Hold Print, or Stored Print. See p.135 “Using
the Document Server”.
AJM012S
