


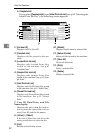


Other Print Operations
90
4
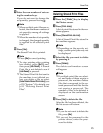
Hold Print
Use this function to temporarily hold
a file in the machine, and print it from
the computer or the machine's control
panel later.
Limitation
❒ A Hold Print file cannot be stored
if:
• the total number of Sample Print,
Locked Print, Hold Print, and
Stored Print files in the machine is
over 100. (The maximum number
varies depending on the volume
of data in files.)
• the file contains over 1,000 pages.
• sent or stored files in the machine
contain over 9,000 pages in total.
Note
❒ If a Hold Print file has not been
stored properly, check the error
log on the control panel (see p.104
“Checking the Error Log”).
❒ Even after you turn off the ma-
chine, stored documents in the ma-
chine remain. However, the [Auto
Delete Temporary Print Jobs] or [Auto
Delete Stored Print Jobs] settings are
applied first (see p.128 “System”).
❒ If the application has a collate op-
tion, make sure it is not selected
before sending a print job. By de-
fault, Hold Print jobs are automat-
ically collated by the printer
driver. If a collate option is select-
ed from the application's Print dia-
log box, more prints than intended
may be produced.
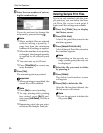
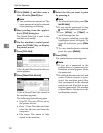
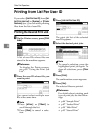
Printing a Hold Print File
The following procedure describes
how to print a Hold Print file with the
RPCS printer driver. For information
about how to print a Hold Print file
with the PostScript 3 printer driver,
see Postscript 3 supplement included as
a PDF file in the supplied CD-ROM.
Limitation
❒ Applications with their own drivers,
such as PageMaker, do not support
this function.
❒ If you are using Mac OS X, you need
Mac OS X v10.2 or higher to use this
function.
Reference
For details about setting printer
drivers, see Printer Driver Help.
You can also print or delete a Hold
Print file from Web Image Moni-
tor. For details, see Web Image
Monitor Help.
Note
❒ The following procedure describes
when you select [Complete List]
from [Initial Print Job List] (see p.80
“Selecting the Initial Print Job
List”).
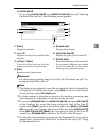
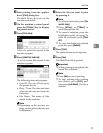
A Configure Hold Print in the printer
driver’s properties.
Reference
For details about configuring
the printer drivers, see the rele-
vant Help files.
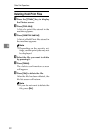
B Click [Details…], and then enter a
User ID in the [User ID] box.