


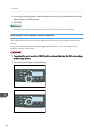


2. Press the [Address Book] key.
CMF140
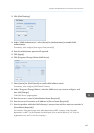
3. Press the [ ][ ] keys to select [Search LDAP], and then press the [OK] key.
4. To select a specific LDAP server, press the [ ][ ] keys to select [Select Server], and then
press the [OK] key.
5. Press the [ ][ ] keys to select the desired LDAP server, and then press the [OK] key.
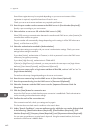
6. To specify specific search conditions, press the [ ][ ] keys to select [Search Condition],
and then press the [OK] key.
7. Press the [ ][ ] keys to scroll through the list of search options, press [ ] to select the
desired item, and then press the [OK] key.
You can select [Identification Name], [Email Address], [Fax Number], [Company Name],
[Department Name], or any other item you have defined in [Key Display (Optional)] under "Search
Options" using Web Image Monitor.
To deselect a search option, press [ ] again.
8. Enter a string of characters that will be used for searching using the number keys, and
then press the [OK] key.
9. Press the [ ][ ][ ][ ] keys to select the search criteria, and then press the [OK] key.
• [Include]: Search for strings that include the specified string.
Example: To search for “ABC”, enter “A”, “B”, or “C”.
• [First Word]: Search for strings that start with the specified string.
Example: To search for “ABC”, enter “A”.
• [Exact Match]: Search for strings that fully match the specified string.
Example: To search for “ABC”, enter “ABC”.
• [Exclude]: Search for strings that do not include the specified string.
Example: To search for “ABC”, enter “D”.
• [Last Word]: Search for strings that end with the specified string.
Example: To search for “ABC”, enter “C”.
• [Fuzzy Search]: Search for strings that are close to the specified string.
Using the LDAP Authentication and Address Search Functions
447