


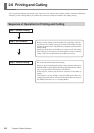


58
Chapter 2: Basic Operation
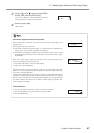
You can set up to three align points. Change the number of points set with [ALIGN POINT]
as required.
The locations on the media of ALIGN POINT 1 through ALIGN POINT 3 are fixed. The
machine automatically determines from the location of the BASE POINT which ALIGN
POINT or points have been set. The screen display the number of each ALIGN POINT
that has been set. For information about the location of ALIGN POINTS, see the previous
section, "Printing with Crop Marks."
Set the align points after you set the BASE POINT. Setting the BASE POINT after setting
ALIGN POINTS clears all the previously set ALIGN POINTS.
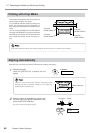
Aligning Manually
Depending on the type of media, it may not be possible to detect crop marks automatically. When crop marks cannot be
detected automatically, you perform alignment manually.
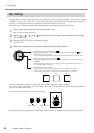
1
Set the location of the origin point. Use [ ],
[ ], [ ], and [ ] to move the center of the
blade to above the lower-right crop mark.
Use the [TOOL UP/DOWN] key to move the
blade up and down and make sure it is posi-
tioned correctly.
2
Press the [BASE POINT] key.
The location where the BASE POINT is set is displayed.
3
Use the [ ], [ ], [ ], and [ ] keys to align
the center of the blade with any of the align
points (ALIGN POINT 1 through ALIGN POINT
3), then press the [ALIGN POINT] key.
The location where the ALIGN POINT is set is displayed.
You can also set more than one ALIGN POINT.
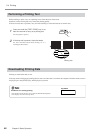
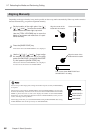
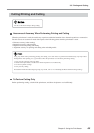
W 1234 mm
B 1
W 1234 mm
B
W 1234 mm L 1.2 m
B 1 2 3
Align the center of the
blade with this location.
Center of the blade
Align the center of the
blade with this location.
This screen shows BASE POINT and
ALIGN POINT1 is setting.
ALIGN POINT 1
BASE POINT
ALIGN POINT 2
ALIGN POINT 3
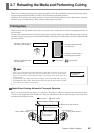
2-7 Reloading the Media and Performing Cutting