


71
Chapter 4: A Wide Variety of Operations
4-3 Setting the Location Where Printing Starts
Setting the Start Location
1
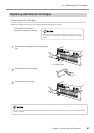
Load media and install a blade, then press the
[SETUP] key.
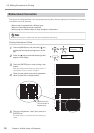
2
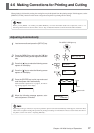
Use the arrow keys to align the blade with the
new printing or cutting start location.
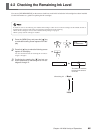
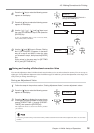
3
Press the [BASE POINT] key.
The display in the figure appears.
To release the setting
The position setting by [BASE POINT] key is released such as the following.
• When printing, cutting, or printing and cutting for one page finish
• Press the [SETUP] key to cancel the setup for the media
When printing, do not use the [ ] key as much as possible to pulling back the media. Otherwise the following may occur.
• The pinch rollers may pass over the printed surface and smudge the ink.
• The grit rollers may leave tracks on the media, reducing printing accuracy.
• Printing may sag.
The center of the blade
The BASE POINT LED lights up
W 782 mm
B
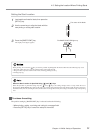
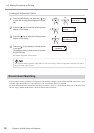
When the Start Location Is Specified Using [ ] and [ ] Keys
When the operation is performed using only the [ ] and [ ] keys, the cutting carriage comes to a stop inside the cover.
Pressing the [BASE POINT] key while in this state sets just the start position for the feed direction (the direction of front-to-
back movement). For the scanning direction (the direction of carriage movement), the setting is made at the edge of the printing
area.