25
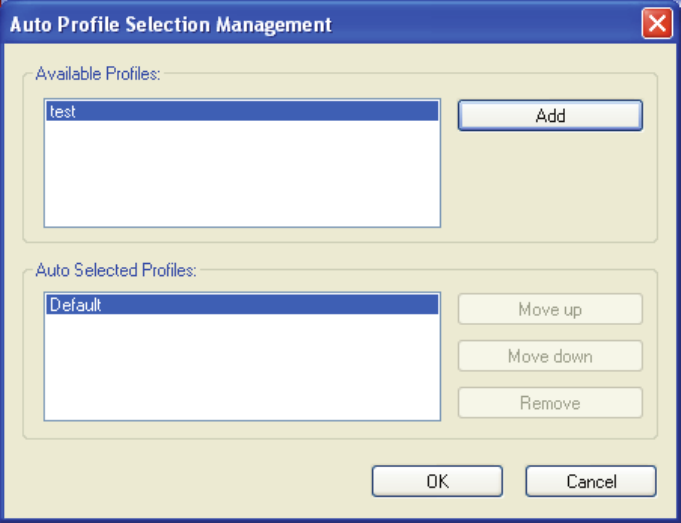
Figure 3-11
3. Highlight the profiles to add to auto profile selection, and click Add. The profile will
appear in the Auto Selected Profiles box.
4. Highlight a profile in the Auto Selected Profiles box.
5. Click Move Up or Move Down as appropriate.
)
Note:
The first profile in the Auto Selected Profiles box has highest priority, while the last profile
has the lowest priority.
6. Click OK.
7. Check the Auto Select Profiles checkbox on the Profile Management tab (shown in
Figure 3-2).
)
Note:
When auto profile selection is enabled by checking Auto Select Profiles on the Profile
Management tab, the client adapter will scan for an available network. The profile with the
highest priority and the same SSID as one of the found networks will be used to connect
to the network. If the connection fails, the client adapter will try the next highest priority
profile that matches the SSID until an available network is found.
3.3 Diagnostics
The Diagnostics tab of the Wireless N Client Utility provides buttons used to retrieve
receiving and transmitting statistics. The Diagnostics tab does not require any
configuration.
The Diagnostics tab lists the following receiving and transmitting diagnostics for frames
received or transmitted by the wireless network adapter:
¾ Multicast frames transmitted and received


