


Runco VX-4000d/VX-5000d Owner’s Operating Manual 37
PRE
L
IMINAR
Y
4.1
Turning on the Power
1. Turn on your source components.
2. Turn on the main power switch at the rear of the DHD Controller.
3. Press the ON button on the remote control -- or the POWER button on the DHD
Controller front panel -- to turn on the system. The vacuum fluorescent display on the
DHD Controller front panel briefly displays “Starting Display.”
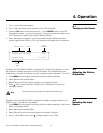
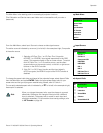
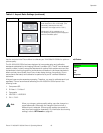
4. When the projector is ready for use, the fluorescent display indicates the active
source, signal format (NTSC or PAL), input resolution and aspect ratio; for example:
4.2
Adjusting the Picture
Orientation
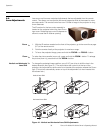
By default, the VX-4000d/VX-5000d is configured for a “floor/front” installation, in which
the projector is installed upright and in front of the screen. If it is installed behind the
screen and/or mounted on a ceiling, you must change the picture orientation. To do this:
1. Press MENU (on menu page 4) and enter the Service Menu passcode.
2. Select Service from the Main Menu.
3. Select Display Device from the Service Menu, then select Configure.
4. Press , then choose Floor/Rear, Ceiling/Front or Ceiling/Rear, to match the
installation method.
4.3
Selecting the Input
Source
By default, the VX-4000d/VX-5000d is configured to display the signal received on its
RGBHV input. To use the DVI input instead:
1. Press MENU (on menu page 4) and enter the Service Menu passcode, if the Service
Menu is not already visible.
2. Select Service from the Main Menu.
3. Select Display Device from the Service Menu, then select Configure.
4. Input 1 is the RGBHV input. Press to select projector input 2 (DVI).
4. Operation
Component SD NTSC 480i
Anamorphic VivixCi
Current Source Format
Input
Resolution
Aspect
Ratio
You must enter a passcode to access the Service menu.
Note