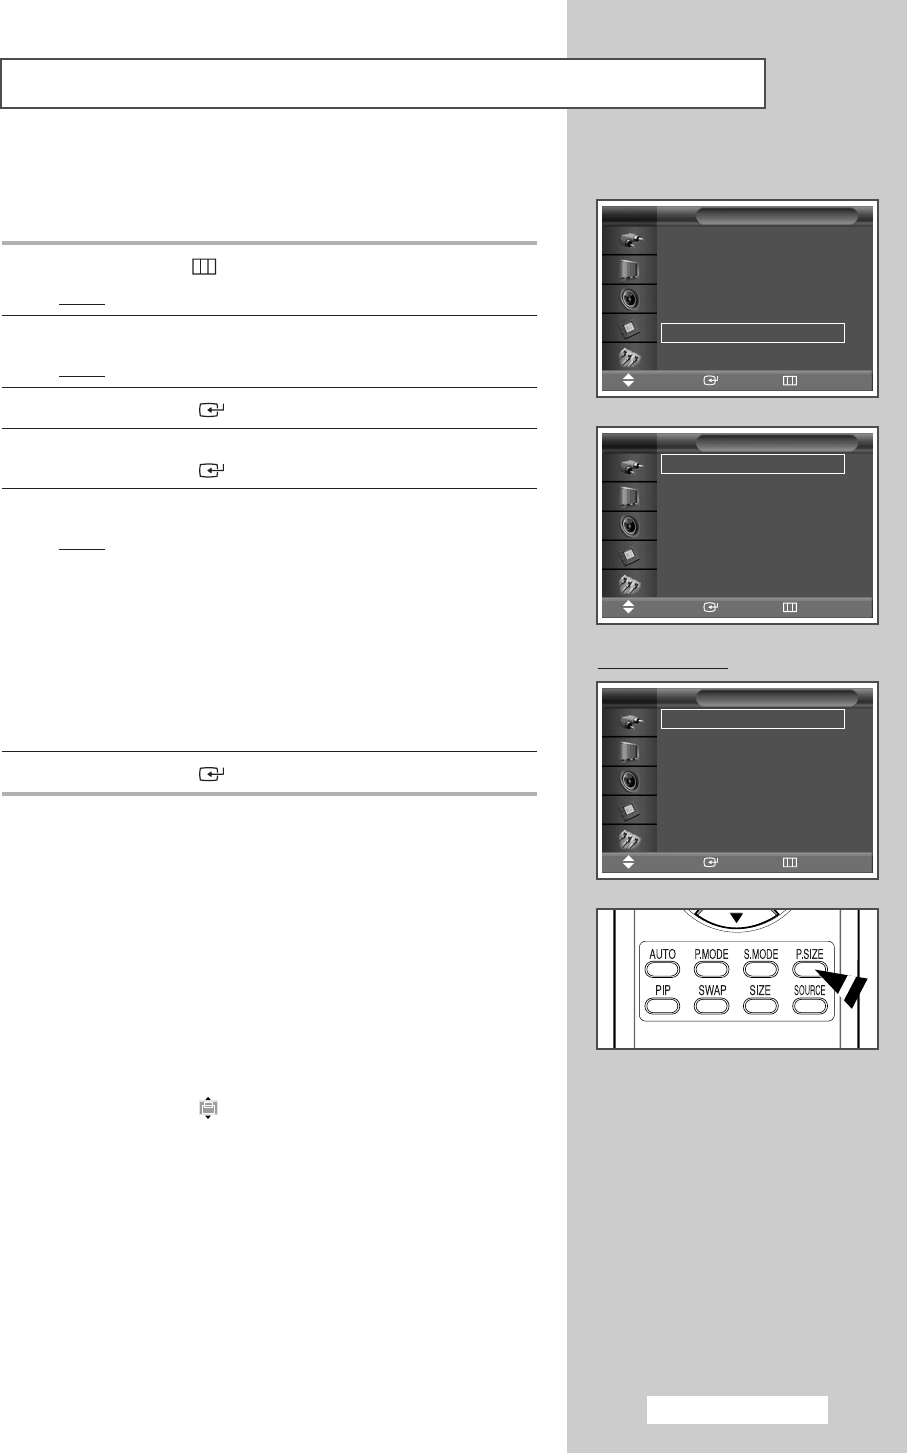
You can select the picture size which best corresponds to your viewing
requirements.
1 Press the MENU ()button.
Result
: The main menu is displayed.
2 Press the … or † button to select Picture.
Result
: The Picture menu is displayed.
3 Press the ENTER () button.
4 Press the … or † button to select Size.
Press the
ENTER () button.
5 Select the required option by pressing the … or † button.
Result
: The following options are available.
◆ 16:9 : Sets the picture to 16:9 wide mode.
◆ Panorama : Use this mode for the wide aspect ratio of a
panoramic picture.
◆ Zoom1 : The screen size when wide screen is vertically
enlarged.
◆ Zoom2 : The screen size when the Zoom1 screen is
vertically enlarged.
◆ 14:9 : Magnify the size of the picture more than 4:3.
◆ 4:3 : Sets the picture to 4:3 normal mode.
6 Press the ENTER () button.
➢
◆ You can select these options simply by pressing the P.SIZE
button on the remote control.
◆ If you change the picture size In PIP mode, PIP disappears
automatically.
◆ Depending on the input source, the P.SIZE options may vary.
Positioning and Sizing the screen using Zoom
➢
◆ Resizing the screen using the Zoom enables the positioning
and sizing of the screen to up/down direction using the
… or
† button as well as the screen size.
◆ Move the screen up/down using the … or † button after
selecting the by pressing the
œ or √ button.
◆ Screen enlargement operates only in AV/S-Video/Component
input modes.
◆ In PC or DVI mode, you can select either 16:9 or 4:3.
Selecting the Picture Size
English - 23
Mode : Dynamic
√√
Custom
√√
Color Tone : Normal
√√
Color Control
√√
Film Mode : Off
√√
Size : 16:9
√√
PIP
√√
Picture
Move Enter Return
16:9
Panorama
Zoom1
Zoom2
14:9
4:3
Size
Adjust Enter Return
16:9
Panorama
Zoom1
Zoom2
14:9
4:3
Size
Adjust Enter Return
PC to DVI Mode
BN68-00848F-00Eng_0803 8/3/05 9:52 AM Page 23
