


English 6
If you are experiencing the above, then please follow the steps given below to solve the
problem.
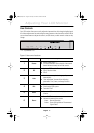
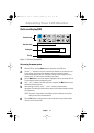
1.Touch the “MENU” button to bring up OSD window.
2.Select “Hz” menu.
3.Press “MENU” button seven times while keeping “Hz” menu highlighted.
4.The monitor’s displayed mode will be changed from UXGA mode to WUXGA mode,
or from WUXGA mode to UXGA mode depending on the current mode.
Plug and Play
The adoption of the new
VESA
®
Plug and Play solution eliminates complicated and time
consuming setup. It allows you to install your monitor in a Plug and Play compatible system
without the usual hassles and confusion. Your PC system can easily identify and configure
itself for use with your display. This monitor automatically tells the PC system its Extended
Display Identification Data (EDID) using Display Data Channel (DDC) protocols so the PC
system can automatically configure itself to use the flat panel display. If your PC system needs
a video driver, follow the instructions given below according to the operating system your
computer uses.
Installing the Video Driver
The CD that accompanies this product contains the necessary drivers for installing your
monitor. Please refer to the driver installation instructions included with your CD package for
more information.
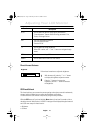
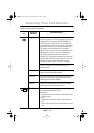
Self-Test Feature Check (STFC)
Your monitor provides a self-test feature that allows you to check whether your monitor is
functioning properly. Make sure that PC is selected as a primary source by checking if the source
indicator LED labeled “PC” is on. If your monitor and computer are properly connected but the
monitor screen remains dark and the power indicator is blinking, run the monitor self-test by
following the steps given below:
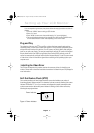
Figure 4. Power Indicator
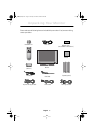
Setting up Your LCD Monitor
Power Indicator
240T(E)body2.fm Page 6 Monday, October 23, 2000 6:32 PM