


11
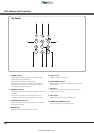
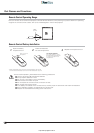
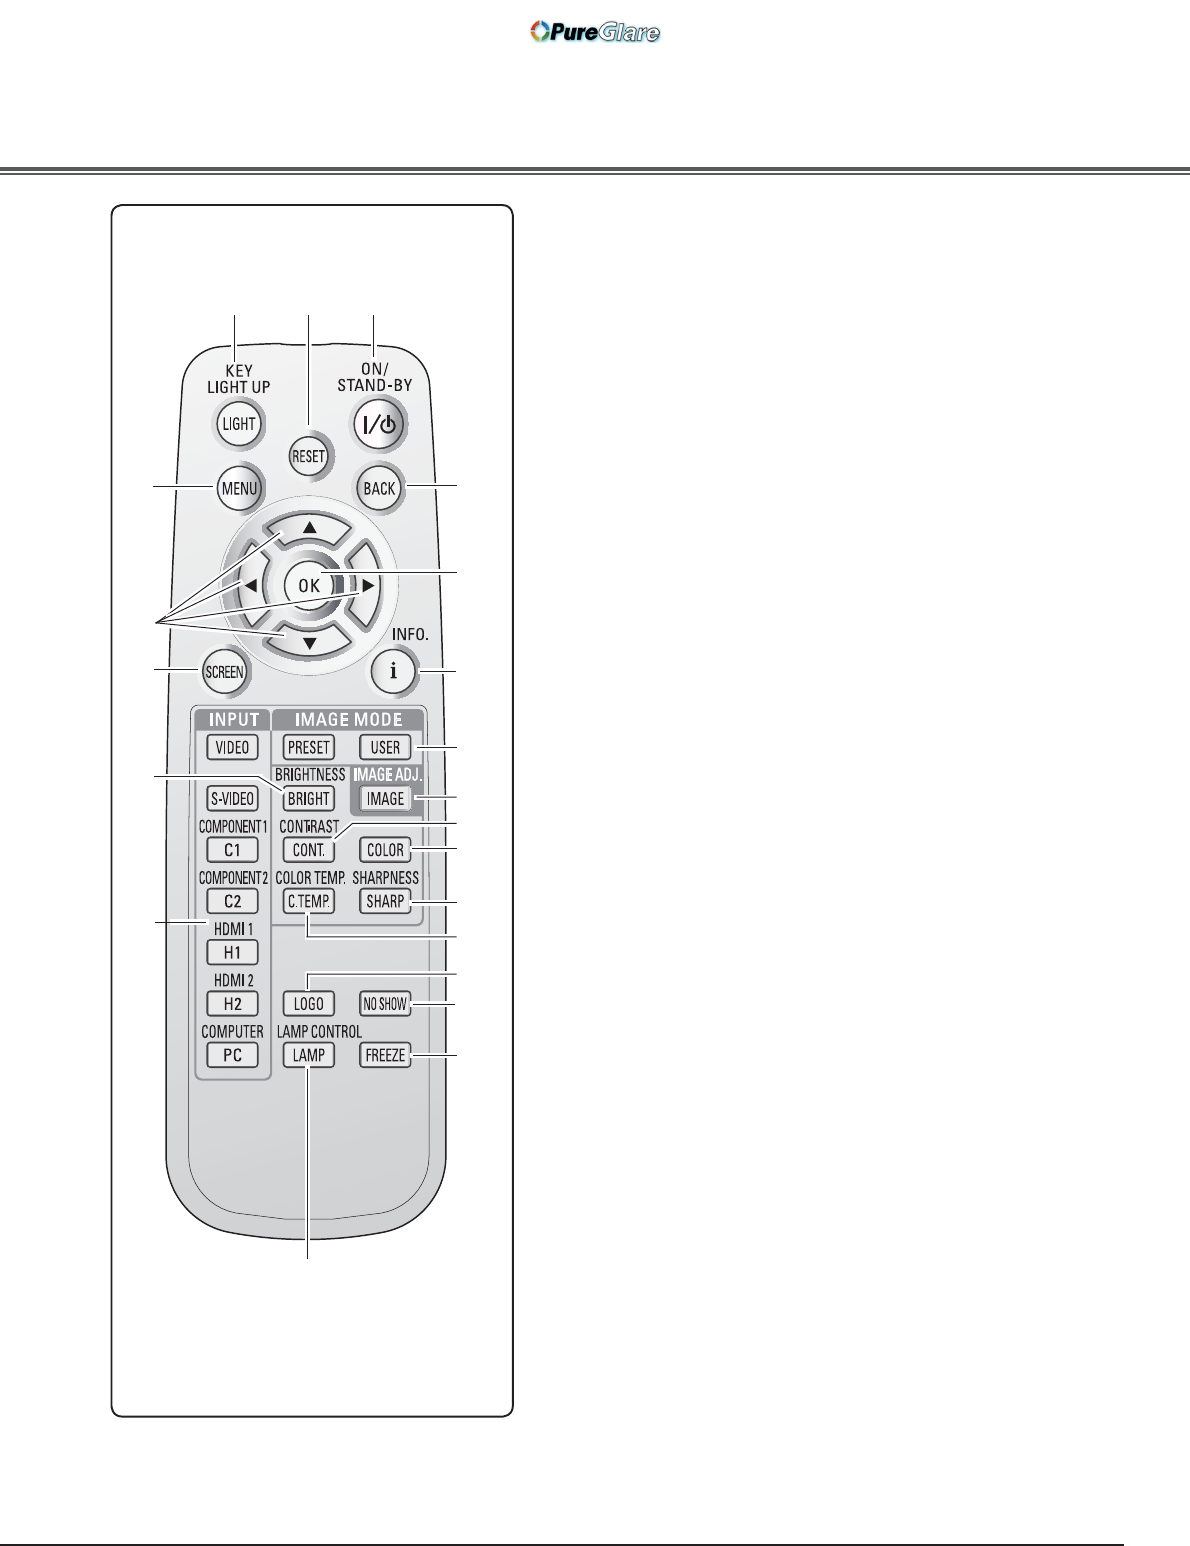
Remote Control
J8
B LAMP CONTROL button
Select a lamp mode (pp.23, 29).
8 LIGHT button
Light up the remote control buttons for about 10 seconds
(p.22).
COLOR button
Adjust the color intensity of a projected image (pp.23, 28).
D POWER ON/STAND-BY button
Turn the projector on or off (pp.18, 19).
E
H
G
B
L
<
H BRIGHTNESS button
Adjust the brightness of a projected image (pp.23, 28).
E MENU button
Open or close the On-Screen Menu (p.20).
G POINT ! buttons
Select an item or adjust the setting values in the On-Screen
Menu.
L SCREEN button
Select a screen size (pp.22, 35
).
LOGO button
Display the captured logo (p.23).
< INPUT buttons
Select an input source (p.24
).
IMAGE MODE buttons
Select an image mode (pp.23, 27).
CONTRAST button
Adjust the contrast of a projected image (pp.23, 28).
IMAGE ADJ. button
Display the Image adj. Menu items one at a time and directly
adjust the selected items (pp.23, 28).
OK button
Execute the selected item or access the sub-menu items (p.20).
FREEZE button
Freeze the projected image (p.23).
INFO. button
Display the input source information (p.43).
To ensure safe operation, observe the following precautions:
–Do not bend, drop, or expose the remote control to
moisture or heat.
–For cleaning, use a soft dry cloth. Do not apply benzene,
thinner, splay, or any other chemicals.
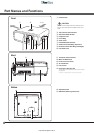
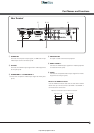
Part Names and Functions
D
NO SHOW button
Temporarily turn off the projected image (p.23).
COLOR TEMP. button
Adjust the color temperature of a projected image (p.28).
SHARPNESS button
Adjust the sharpness of a projected image (pp.23, 29).
J RESET button
Reset to the previous figure.
This function is limited to when selecting the Image Adjustment
(pp.28 – 33) and Picture Adjustment (p.34).
BACK button
Return to the previous menu.
http://www.pureglare.com.au