65
6. Sending Stored Scan Data
by E-mail
Stored scan data can be sent to a specified destination using e-mail. This chapter
explains the various display screens, delivery procedures, and how to check the
sending result when this function is used.
List Displays of Destinations and Senders
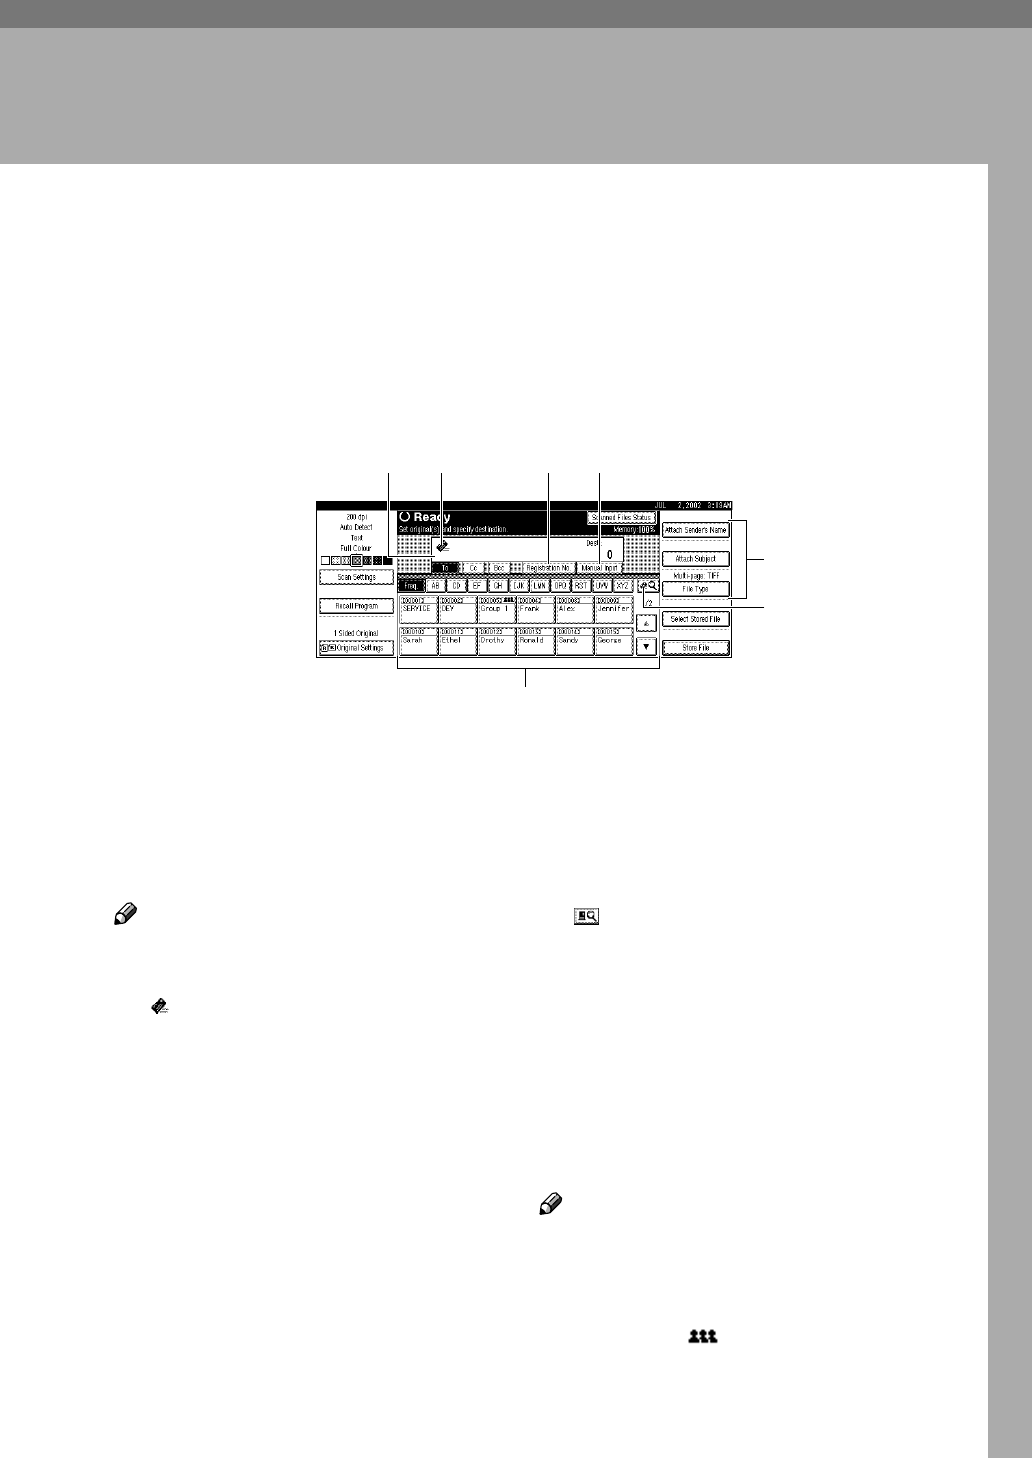
The screen configuration when using the machine as e-mail is as shown:
1. Destination Display
The selected destination is shown here. If
several destinations are selected, the des-
tinations are displayed in the order there
were selected by pressing [U
UU
UPrev.] or
[T
TT
TNext].
Note
❒ Pressing the {
{{
{Check Modes}
}}
} key lets
you verify the selected destinations.
2.
[] E-mail Icon
This icon shows that the screen for send a
e-mail is displayed.
3.
[Registration No.]
Press this to specify a destination using a
5-digit short ID number.
4.
[Manual Input]
When specifying a destination that is not
listed, press [Manual Input] and enter the
destination with the soft keyboard.
5.
[Attach Sender’s Name] [Attach Sub-
ject] [File Type]
Set the sender and the subject of the de-
livered document.
If necessary, select the file type of the im-
age file attached to the e-mail.
6.
[] Switch Destination List/Search
by User Name
Press this button to switch a destination
from the delivery server list to the desti-
nation list of this machine or to search us-
ing the user’s name.
7. Destination List
Displays the list of destinations pro-
grammed in the delivery server or this
machine.
Note
❒ When the entire list does not fit on one
screen, [U
UU
U] or [T
TT
T] can be used to scroll
the display.
❒ Group destinations are denoted by
this symbol ( ).
❒ A bar above a title indicates that a des-
tination that belongs to it has been se-
lected.
5
6
7
2 3 41


