10
GETTING STARTED
GETTING STARTED
LOADING COPY PAPER
To save space, this copier has been designed with adjustable front-loading
trays, which are easily opened for paper loading. For best results, use only
SHARP recommended paper. (See page 65.)
The paper required ( ) indicator will light up when there is no copy paper
in the selected paper feed station, or when the selected paper tray is not
installed or is improperly installed.
When the paper size is changed in a paper tray, the size
of the paper must be entered by steps 8 through 11 on
page 12. If not, the edges of copies may become smudged
with toner. Also, the AUTO PAPER SELECT and the AUTO
IMAGE features will not function properly.
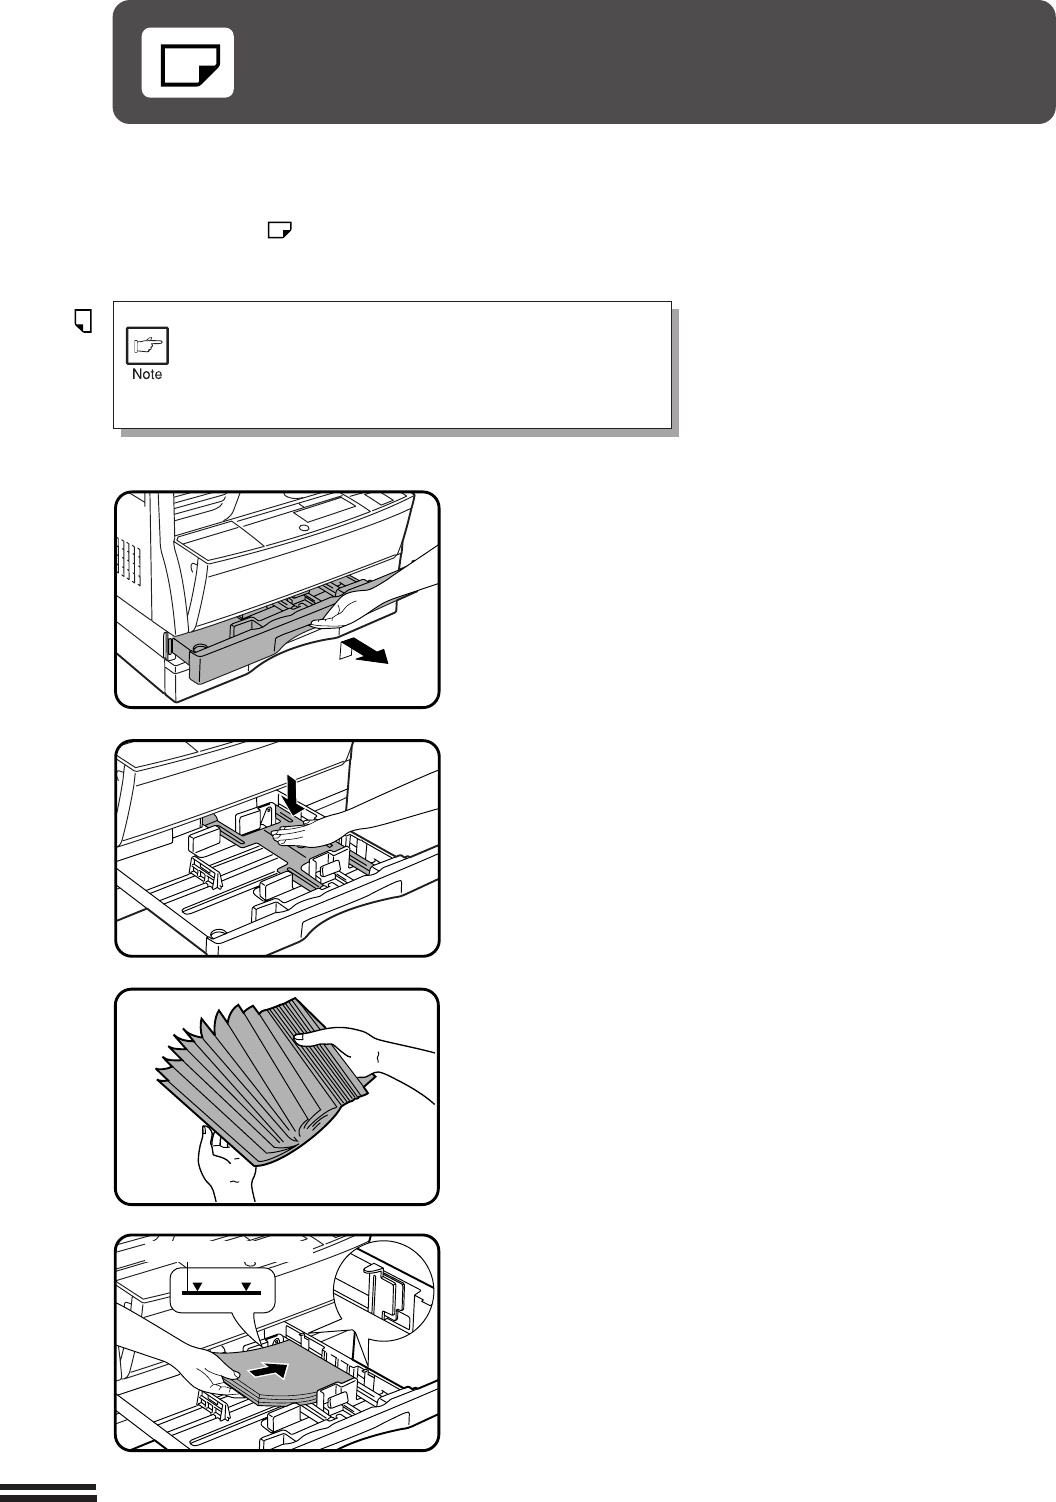
1
Gently lift and pull out the paper tray until it stops.
2
Push the pressure plate down until it locks in place.
3
Fan the copy paper and insert it into the tray. Make sure
the edges go under the corner hooks.
●
If you change to a different size of copy paper, the tray must be
adjusted. See the next page.
●
Set the paper along the guides.
●
The tray holds up to 250 sheets of 21 lb. bond paper.
Do not load paper above the maximum height line.
4
Push the paper tray firmly back into the copier.
Loading copy paper
Maximum height line


