15
MAKING COPIES
●
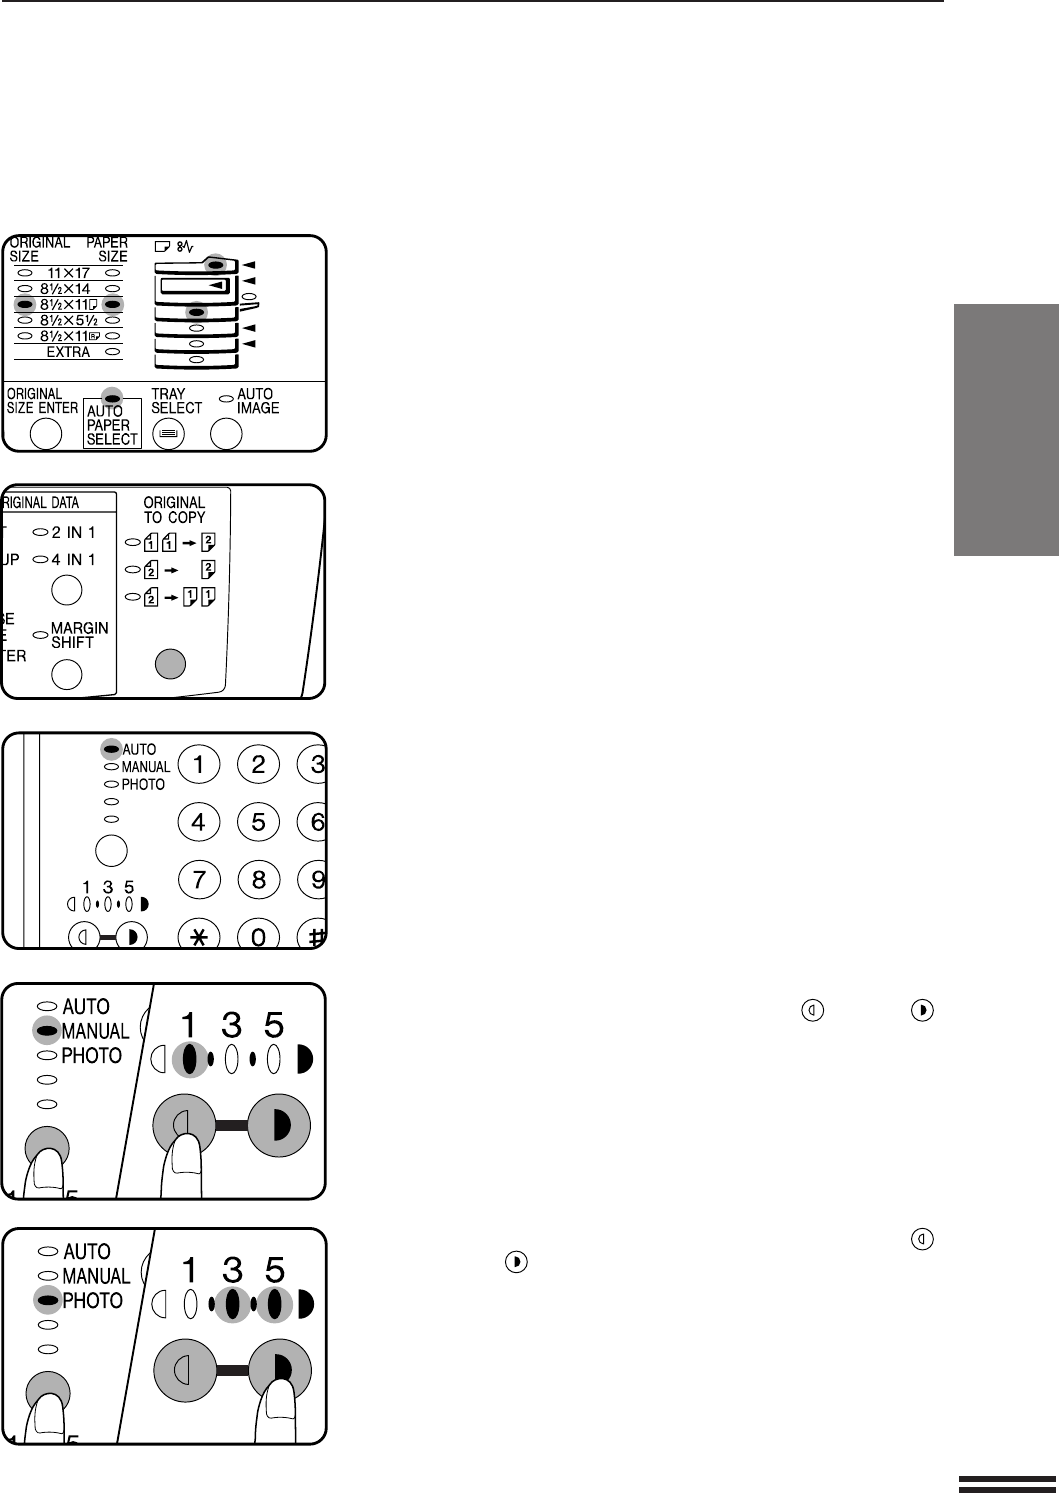
The ORIGINAL SIZE indicator for the detected original size will
light up, and the paper tray with the corresponding paper size will be
automatically selected.
●
The auto paper select function can be disabled using user program No.
8. If this function has been disabled, use the TRAY SELECT key to
select the desired paper tray. See page 51, USER PROGRAMS.
●
To copy onto a different size paper, use the TRAY SELECT key to
make the selection.
●
The bypass tray cannot be automatically selected.
4
Ensure that the one-sided to one-sided copying mode is
selected in the ORIGINAL TO COPY section of the
operation panel.
●
When no indicator in the ORIGINAL TO COPY section is lit, the
one-sided to one-sided copying mode is selected.
5
Adjust the copy density.
●
This copier has three exposure modes to choose from — AUTOMATIC,
MANUAL, and PHOTO.
●
Automatic exposure is the standard initial setting for this copier. In
this mode, the characteristics of the original are “read” by the
exposure system and adjustments are automatically made. This
optimizes the contrast of the copied images by reducing the effect of
colored or shaded background areas. See page 30 to adjust the
automatic exposure level.
●
For manual density adjustment, press the AUTO/MANUAL/PHOTO
key to select MANUAL and adjust with the light ( ) and dark ( )
keys as desired.
●
For photographs, select PHOTO and then adjust with the light ( )
and dark ( ) keys as desired.
●
There are 5 exposure steps indicated by 3 indicator lights. (The
indicators light up one or two at a time.)
If exposure level 2 is selected, the two left-handmost indicators for
that level will light up simultaneously. Also, if level 4 is selected, the
two right-handmost indicators for that level will light up
simultaneously.
Normal copying
NORMAL COPYING
