


-27
Setting up the Projector Using RS-232C or Telnet
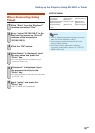
Disconnecting All Connec-
tions
([D]Disconnect All)
It is possible to disconnect all the TCP/IP
connections currently recognized by the
projector. Even if the COM Redirect port is
fi xed in the Busy status due to a problem, it is
possible to force the Ready status back by
carrying out this disconnection.
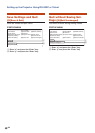
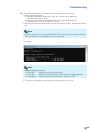
setup>d
Disconnect All Connections(y/n)?y
Now Disconnecting...
1
2
1 Enter “d” and press the “Enter” key.
2 Enter “y” and press the “Enter” key.
If Disconnect All is performed, the connection
to the projector via network will be forcibly
disconnected.
•
Note
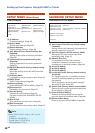
Entering ADVANCED
SETUP MENU
([A]Advanced Setup)
Enters ADVANCED SETUP MENU.
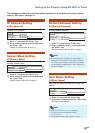
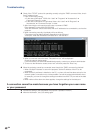
setup>a
********************** ADVANCED SETUP MENU *************************
[1]Auto Logout Time [2]Data Port
[5]Network Ping Test
[6]Accept IP Addr(1) [7]Accept IP Addr(2) [8]Accept IP Addr(3)
[9]Accept All IP Addr [0]Search Port
[!]Restore Default Setting
[Q]Return to Main Menu
advanced>
1
1 Enter “a” and press the “Enter” key.
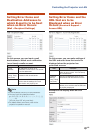
Setting Auto Logout Time
(ADVANCED[1]Auto Logout Time)
If there is no input after a fi xed time, the
projector automatically disconnects network
connection using the Auto Logout function. It
is possible to set the time until the projector
is automatically disconnected in units of a
minute (from 1 to 65535 minutes).
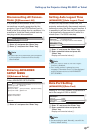
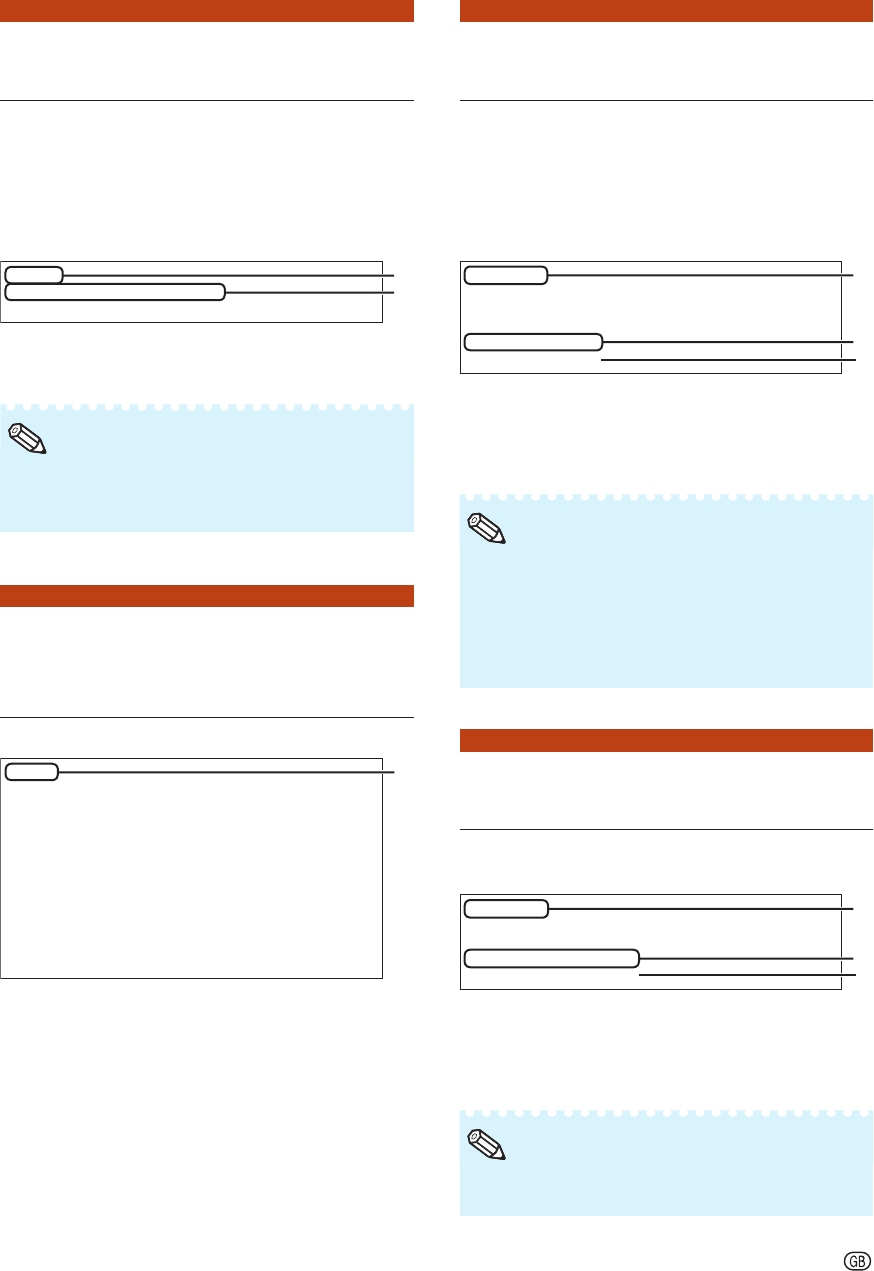
advanced>1
Valid range : 0 to 65535 (minute)
note: if you enter “0”, auto logout function will be disable.
Auto Logout Time : 5
Please Enter :15
(change) —> 15
1
2
*
1 Enter “1” and press the “Enter” key.
2 Enter numerical value and press the
“Enter” key.
Display set numerical value (*).
If the set value is made 0, the Auto Logout
function is disabled.
If an invalid number is entered, an error
message (“Parameter Error!”) will be displayed
and the screen returns to the ADVANCED
SETUP MENU.
•
•
Note
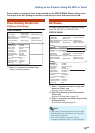
Data Port Setting
(ADVANCED[2]Data Port)
Setting of TCP port number. It is possible to
set in the range of 1025 to 65535.
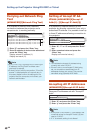
advanced>2
Valid range :1025 to 65535
Data Port :10002
Please Enter :10005
(change) —> 10005
1
2
*
1 Enter “2” and press the “Enter” key.
2 Enter numerical value and press the
“Enter” key.
Display set numerical value (*).
Set according to need. Normally, use with the
factory default setting.
•
Note