


33
Useful Features
• This function allows you to specify the image to be
displayed upon the projector’s startup.
• A custom image (i.e. your company logo) can be
loaded on the projector via IrCOM or an RS-232C
cable. See pages 15 and 22 in this operation manual,
and also the supplied Sharp Advanced Presentation
Software’s operation manual for detailed instructions.
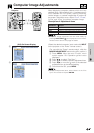
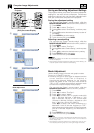
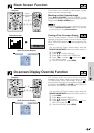
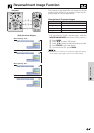
Description of Startup Images
(For use with the “Power” remote control, slide the
MOUSE/ADJUSTMENT switch to the ADJ. position.)
1 Press MENU.
2 Press ß/© to select “Options”.
3 Press ∂/ƒ to select “Startup Image”, and then press
©.
4 Press ∂/ƒ to select the startup image you want to
display on the screen.
5 Press ENTER to save the setting.
6 To exit from the GUI, press MENU.
• By selecting “Custom”, the projector can display a custom
image (i.e. your company logo) as the startup image.
Custom image must be 256 colour BMP. Please see the
Sharp Advanced Presentation Software’s operation manual
for how to save (or change) a custom image.
Selected item
Sharp
Custom
None
Startup image
SHARP default image
User customised image (i.e. company logo)
Black screen
ON
MUTE
TOOLS
R-CLICK ENTER
INPUT
MOUSE
LIGHT
LCD PROJECTOR
ADJ.
IrCOM
FREEZE
AUTO SYNC
KEYSTONE
ENLARGE
MENU
LASER
BLACK
SCREEN
VOL
OFF
5
2, 3, 4
1, 6
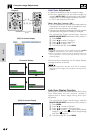
Projector
MOUSE
ADJ.
(GUI) On-screen Display
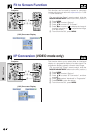
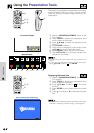
This function allows you to instantly freeze a moving
image. This is useful when you want to display a still
image of a computer or video, giving you more time to
explain the image to the audience.
1 Press FREEZE to freeze the image.
2 Press FREEZE again to return to the moving
image.
Projector
TOOLS
R-CLICK ENTER
INPUT
MOUSE
LIGHT
ADJ.
IrCOM
FREEZE
AUTO SYNC
KEYSTONE
ENLARGE
MENU
LASER
BLACK
SCREEN
1, 2
On-screen Display
Freeze Function
Selecting a Startup Image