ENGLISH
9
SET-UP
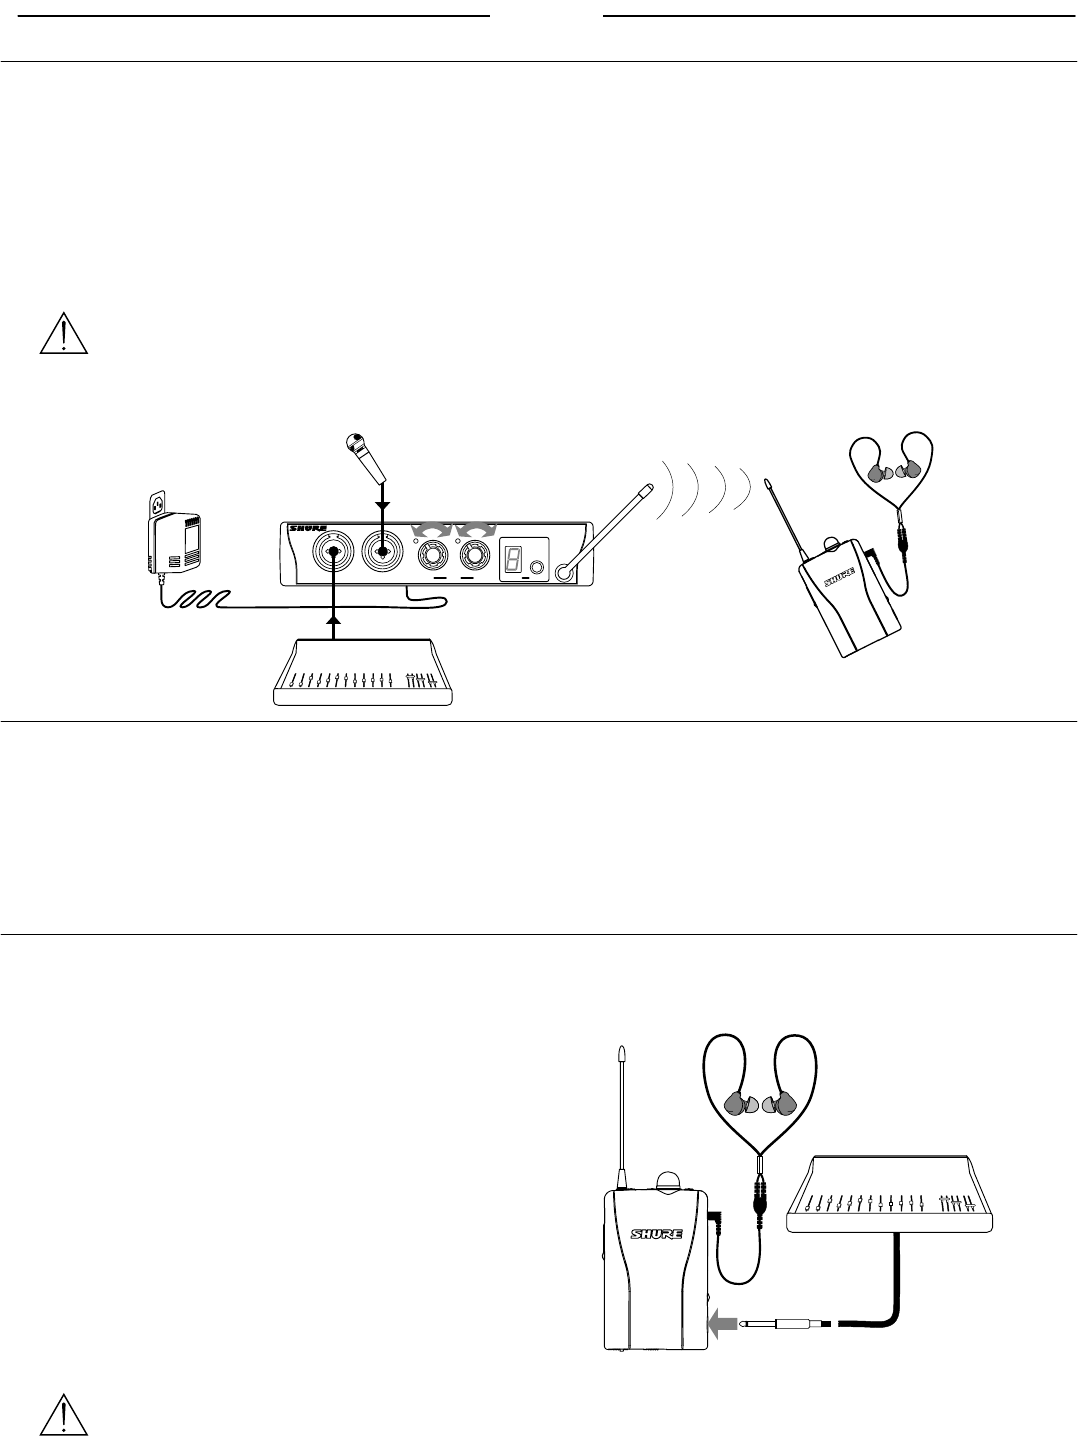
Wireless System Set-Up
To configure the P2T TransMixer and P2R Receiver for wireless operation:
1.
Plug the power supply into the DC INPUT connector on the
rear panel of the P2T, then plug it into a power outlet.
2. Connect audio sources to the combo XLR/
1
/
4
-inch jacks on
the front panel.
3. Select a frequency channel (1-8). See the Selecting a Fre-
quency Channel section on page 6 for details.
IMPORTANT: Never set more than ONE
TransMixer to the same frequency channel, or
interference will occur.
4. Observe the signal/clip LEDs. If they are consistently
red, decrease the level with the corresponding INPUT
level knob.
5. To pass audio signal directly through the TransMixer, use
the corresponding SPLIT OUT connector on the rear panel
of the device.
6. Turn the On/Off/Volume knob on the P2R clockwise past click
(On). Leave the volume setting low.
7. Set the P2R to the same frequency channel as the P2T.
8. Check the RF LED on the P2R to confirm that transmission
is being received.
9. Plug earphones into the earphone output jack. Insert the
earphones into your ears as instructed in the earphone
user’s guide.
10. Slowly increase the P2R volume to a comfortable level.
CHANNEL
SELECT
PSM200 TransMixer
MIC/LINE1
MIC/LINE2
1
INPUTS
2
Mixing Console
Hybrid Wired/Wireless System Set-Up
To configure the P2T TransMixer and P2R Receiver for hybrid wired/wireless operation:
1.
Follow steps 1-9 of the Wireless System Set-Up section.
2. Connect an audio source to the
1
/
4
-inch MIX IN jack on
the side of the P2R.
3. Set the GAIN switch to LO initially and set the source
volume to a moderate level.
4. Attach the P2R onto your belt, waistband, or another location.
5. Slide the audio cable or earphone cord into the cable man-
agement groove.
6. Slowly increase the P2R volume to a comfortable level. Set
the GAIN switch to HI if you need more level.
P2R Stand-Alone Wired Set-Up*
To configure the P2R Receiver as a stand-alone personal monitor:
1. Turn the On/Off/Volume knob clockwise past click (On).
Leave the volume setting low.
2. Set the CHANNEL to “A” with the SELECT Button. See the
Wired Mode section on page 8 for details.
3. Connect an audio source to the
1
/
4
-inch MIX IN jack on
the side of the P2R.
4. Set the GAIN switch to LO initially and set the source
volume to a moderate level.
5. Attach the P2R onto your belt, waistband, or another
location.
6. Slide the audio cable or earphone cord into the cable
management groove.
7. Plug the earphones into the earphone output jack. Insert
the earphones into your ears as instructed in the ear-
phone user’s guide.
8. Slowly increase the P2R volume to a comfortable level.
Set the GAIN switch to HI if you need more level.
Mixing Console
NOTE: Setting the P2R receiver to “A” disables its wireless capability and extends the battery life.
* If you have purchased the P2R as a stand-alone personal monitor, you can go wireless by simply purchasing a
P2T TransMixer.


